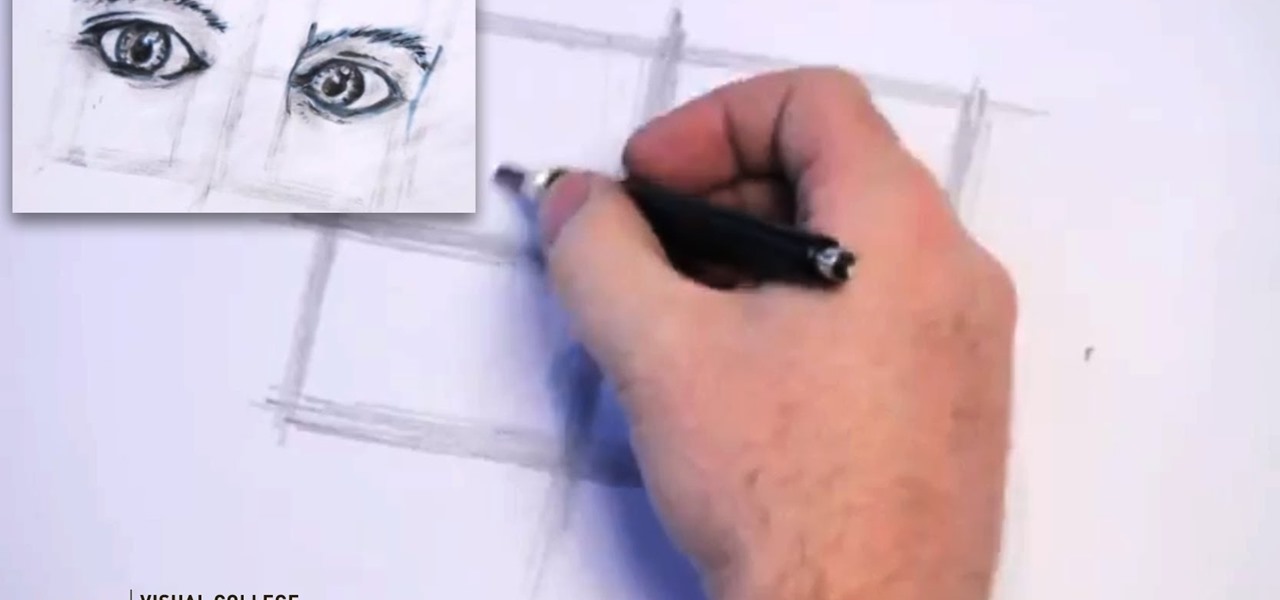

Step 1:
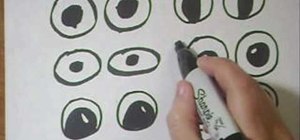
In This Four Part Tutorial We Will Learn How to Draw Two Eyes. Let's Begin with a Straight Line, Which Will Serve as a Horizon Line and Will Give Us an Idea Where the Shapes Are Going to Be. Then We Should Draw a Vertical Line to Make a Cross So That We Know Where the Center Point Is. To Achieve Better Results Try to Draw Lose Lines. At This Stage the Goal Is to Make a Rectangle with the Equal Top and Bottom Parts.as We Move on We Need to Draw Corner Lines So That We Know Where Our Eyes Are Going to Be. The Width of the Middle Part Between the Eyes Should Be of the Size of an Eye. As Soon as It Is Done We Can Move on with the Oval Shapes of the Eyes to Get a Feeling of the Eyes. Next Step Is to Draw Eyebrows. There Are No Particular Rules on That, Just Sketch and See How It Looks. Alter Them as You Want to Achieve the Look You Are Going for.Time to Time Go Back to the Lines and Redraw Them So That You Know Where Other Shapes Like Nose and Mouth Are Going to Be. Mark the Shapes of the Eyes or in Other Words Make the Shapes Darker. After the Shapes Are Blocked We Can Start Drawing Pupils of the Eyes in the Shape of a Circle. As We Move on Mark Out the Shapes So That Later on We Can Expression to the Eyes.
Step 2:
Take a Marker and Make the Pupil of the Eye Darker. That Is the Area That We Will Exaggerate with the Expressions Once We Get into the Iris and Center Point of the Eye.Let's Start to Mark in the Center Point and Put Some Shapes In. Think About the Lights That Are Going to Shine into the Eyes. The Reflection Has to Be in the Same Direction in Both Eyes Because We Don't Want to Make Them Look if They Were Floating. You Should Now Connect the Reflection of the Light with the Iris of the Eye So That We Can Move on and Work on the Expression of the Eyes.Now We Can Start Exaggerating Outlines of the Eyes. The Most Challenging Part Is to Connect the Upper and Lower Part of the Oval. The Goal Here Is to Mix Edges with the Curves.as We Start Drawing the Other Eye with the Marker, You Should Always Keep in Mind Where the Other Eye Will Be Looking At. We Want to Make Both Eyes Look into the Same Direction. In Order to Achieve That Attach Both Pupils to the Same Cheek Area.the Second Eye Should Be a Little Bit Smaller Than the First One. As We Keep Drawing Don't Forget About the Reflection of the Light Source in the Other Eye.We Started with the Oval Shapes, but Now We Can Shape Both Eyes So That We Can Get More Realistic Look of Them. We Need to Exaggerate the Center Point of Both Eyes to Add Expression and Character.
Step 3:
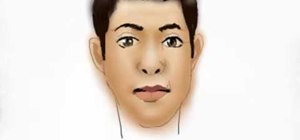
We Slow Down a Little Bit in Order to Figure Out Where the Edge of the Nose Will Be. The Top Part Is Coming from the Forehead into the Nose. We Are Not Going to Draw the Nose Here, but We Need to Figure Out Where the Eyebrow Will Touch It.Now We Can Move on with the Eyebrows by Adding Different Shapes to Them. Also, at This Stage We Can Start Adding Details to All of the Elements We Have Here.It Is Very Useful to Stop for a Moment and Take a Look at Your Drawing So That You Can Get the Feel and Make Sure That You Are Working in the Desirable Direction.Eyes Is a Very Important Part of the Human Body Because Approximately 80% of the People Look into the Eyes First. By Adding the Right Expression to the Eyes You Put the Soul into the Drawing. All the Other Body Parts Serve the Secondary Role.Now We Can Take a Pen and Add Some Darker Lines to the Eyes, Which Will Allow Us to Work More on the Quality of the Lines -- Softer, Darker or Lighter. Add Some Details with the Pen Over the Top of the Drawing. Avoid Using One Long Line, but Use Lots of Shorter Lines Instead Otherwise Your Drawing Will Not Have Any Life in It.Keep Working with the Pen, Stop and Evaluate the Result -- What Should Be Added and What Has to Be Changed. Don't Be Afraid of Spending an Extra Time on Your Drawing Because It Is About the End Result and Not the Time.
Step 4:
Let's Go Back to the Drawing and Erase the Construction Lines. I Love Working with the Simple Lines at the Beginning and Then to Move on to the More Complex Ones as We Progress with the Drawing.Now We Can Add Details and Finish Drawing with Some Shading. This Part Is More About the Creative Side Less Constructive. I Would Recommend Having a Cheek Line in the Drawing Otherwise Both Eyes Will Look Like if They Were Floating.Apply Block Shading to Your Drawing to Achieve the Sense of Depth. Move Your Pencil Around So That the Lines Blend in with the Rest of the Drawing.Take a Look at What You Have and Apply Some Final Touch Ups.
Just updated your iPhone? You'll find new emoji, enhanced security, podcast transcripts, Apple Cash virtual numbers, and other useful features. There are even new additions hidden within Safari. Find out what's new and changed on your iPhone with the iOS 17.4 update.


Be the First to Comment
Share Your Thoughts