

Drawing & Illustration How-Tos


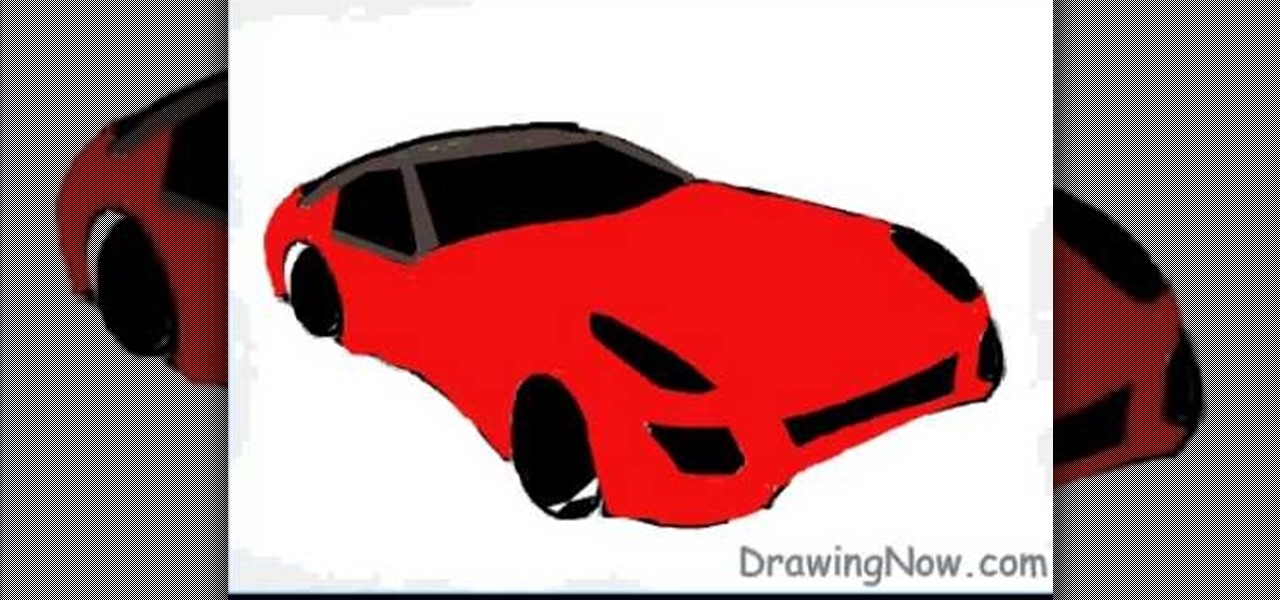
How To: Draw a Ferrari sports car
This video will show you how to draw a Ferrari sports car using MS Paint or a sheet of paper, a pencil and some colors. Just follow these instructions from the video. First you will need to draw the sketch of the car, the wheels and the mirrors. Now use a brush or a marker over the sketch of the car and then erase the pencil sketch. Color the wheels and the windshield with the black marker and the car with a powerful red color. Now complete the drawing by making all of the details like in the...

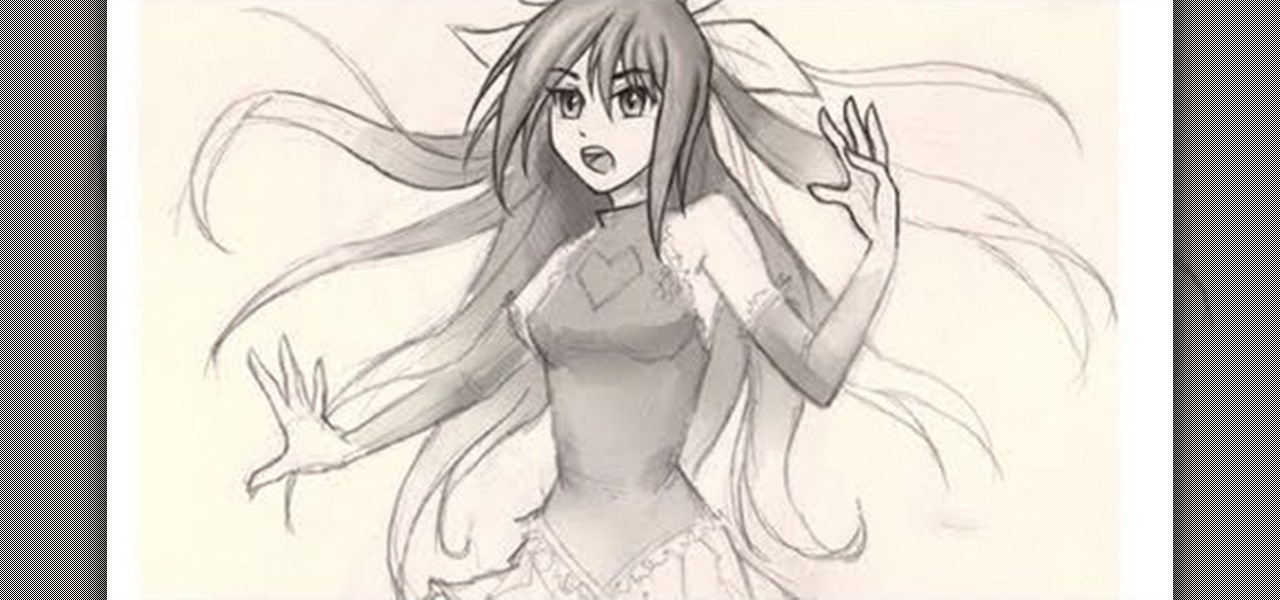
How To: Draw Hinata from Naruto
In this video, we learn how to draw Hinata. To start, you will draw a circle with lines in between it to place where the eyes will go. Next, you will draw in the eyebrows and the other details around the face. After this, draw in the bangs and the hair, adding lines for them to show the different details. After this, you will draw in the area of the neck and then the clothing on the upper body. Finish off the details in the eyes and then shade in the hair and around the body. When finished, s...

How To: Draw a twisted skull
In this tutorial, we learn how to draw a twisted skull. First, draw the outline of the skull and then start to draw in the jaw line around the middle. After you have this drawn out, draw in the teeth on the top and bottom of the face. Then, draw in the eye sockets and the nose shape. From here, start to add in lines that look like cracks around the top and sides of the skull. There is no perfect way to draw this, draw it how you feel it should look! Add in some shading to show the depth and c...
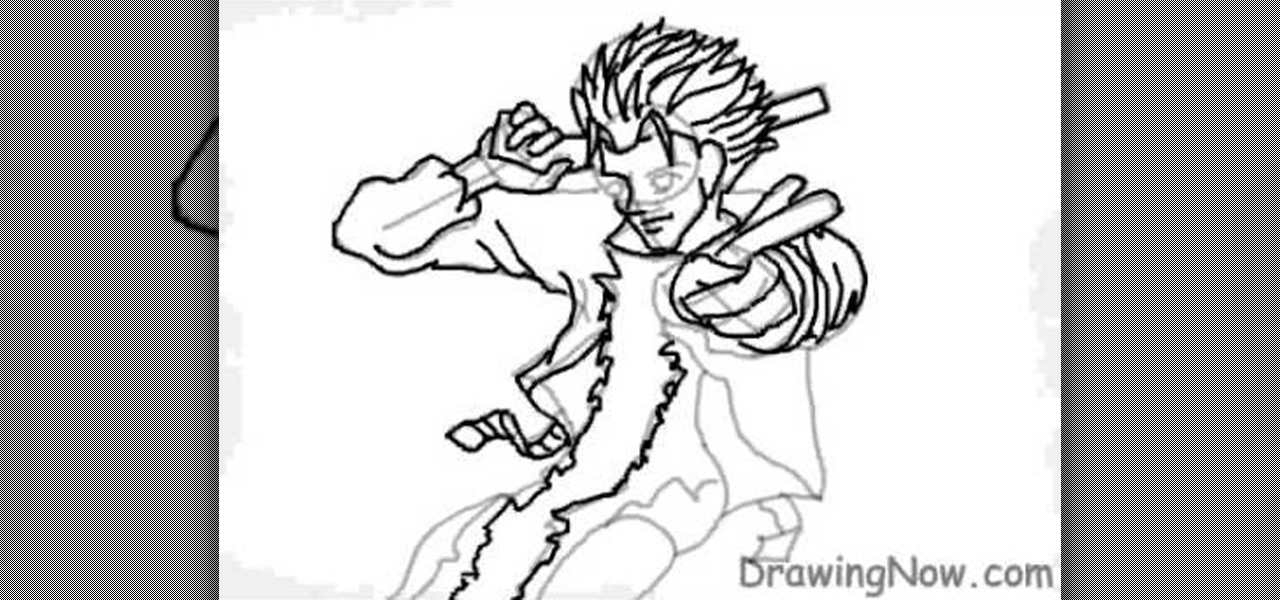
How To: Draw the manga character Vash the Stampede from Trigun
In this video, we learn how to draw the manga character Vash. Start by drawing the outline of the character from the head to the toe. After this, draw in the details of the body and the face. Next, use a paintbrush in black to start to draw over the outline to make a 3D version of it. From here, draw on the details of the body as well as the colors for the skin. After this, draw in the details for the hair and then color in the clothing. Add in shading and lines on the clothing to make it loo...
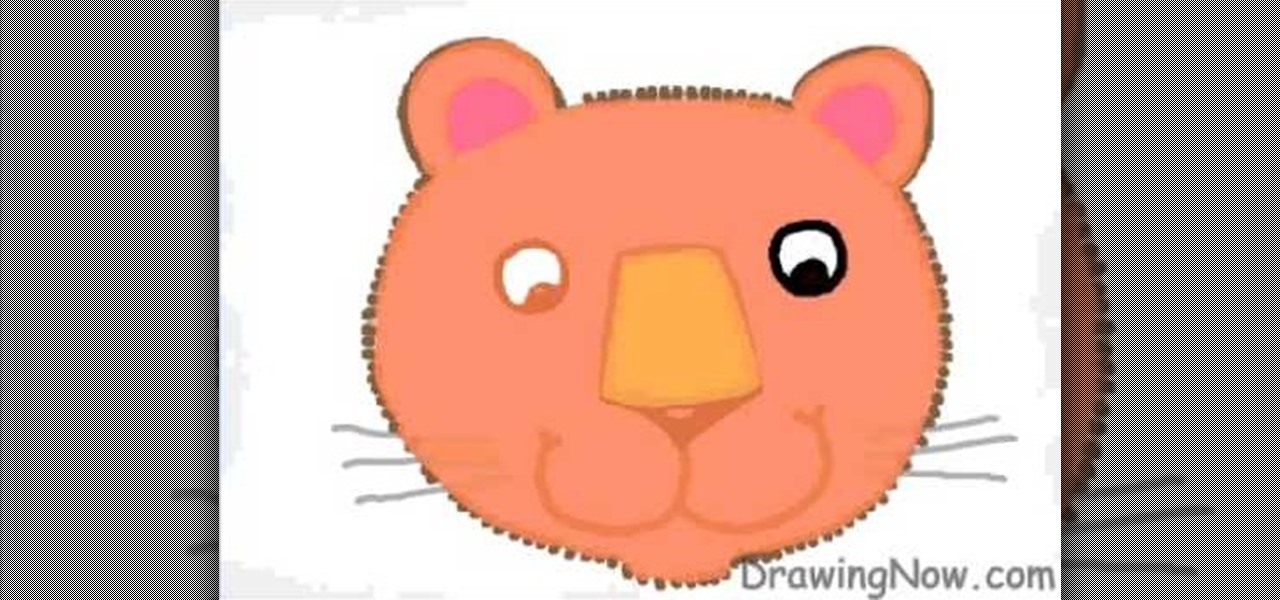
How To: Draw a cute cartoon tiger
In this video, we learn how to draw a cute cartoon tiger. First, draw a circle for the head with two circles on top for the ears. After this, draw in the eyes, nose, mouth, and whiskers. Next, draw small dots around the head in brown for the fur. Then, draw over the mouth and nose with brown to match the outside color of fur. After this, color the eyes and the nose black, then add pink to the inside of the ears. From here, add in stripes to the side of the face and on the top of the head. Sav...

How To: Draw a sphere in 3D
In this tutorial, we learn how to draw a sphere in 3D. First, draw a circle and a square around it with a light pencil. From here, you will use the side of the pencil to shade in the sides of the circle. Then, draw a half circle next to the circle to make it look like it's shadow. Shade that in and then add in more dark markings to the circle, leaving a small white area on the top of it. After this, draw in the outline of the circle and erase any stray lines. This will complete your sphere, e...

How To: Draw the 8-Tails Jinchuuriki, Killerbee
In this tutorial, we learn how to draw the 8-Tails Jinchuuriki, Killerbee. Start out by drawing the outline of the character. You want to make sure you draw reference lines on the head so you know where to place the eyes, nose, and lips. Next, you will start to draw in lines to show wrinkles on the face and then the headband on the top of the head. After this, add some shading into the face to add some depth. From here, you will draw in the hair and the band around the head, giving it more de...
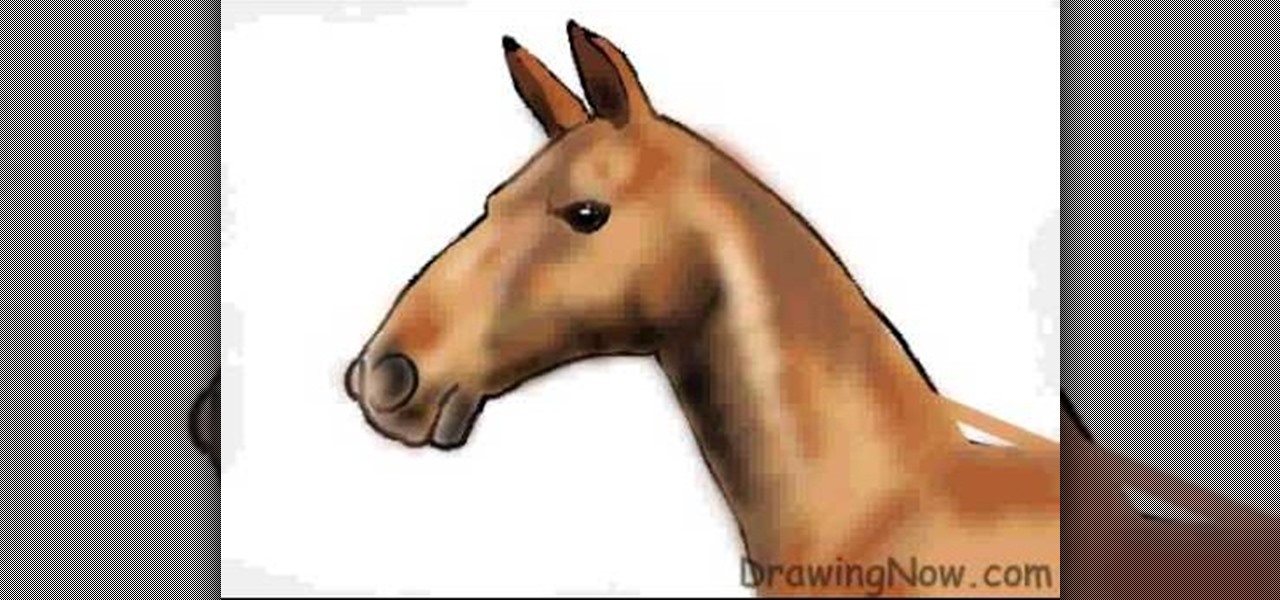
How To: Draw the head of a horse
In this tutorial, we learn how to draw the head of a horse. Start out by drawing the outline of the horse's head and the neck. Then, draw in the ears and the details for the nose and the face. Next, color in the horse and then add shading along the sides of the horse and fill in the features with black. Use different colors of brown to show a contrast between the colors on the horse. After this, you will use small lines to create hair on the horse, then add in additional features. Clean up an...

How To: Draw a Beautiful Unicorn
In this tutorial, we learn how to draw a beautiful unicorn. Start by outlining the unicorn, using circles to show where the head and joints are. Draw long lines for the legs and the tail. Then, draw on the point for the head and start to add in the details of the body. As you continue, add the hair on the back of the unicorn and then shade all around the body. Add colors to the unicorn and then start to make the background. Show it in front of a purple and blue background with a large moon, g...
How To: Draw Optimus Prime, leader of the Transformers
In this tutorial, we learn how to draw Optimus Prime, leader of the Transformers. First, draw the outline of Optimus Prime, use basic lines and circles to show where the joints are going to go. After this, draw the full outline around the character, using a dark line to make it look 3D. Then, draw in the rest of the details for the character, giving him a look like a machine or a bunch of metal. Next, you will start to shade in the different parts and add colors that were used in the movie. W...

How To: Draw The Incredibles
In this tutorial, we learn how to draw The Incredibles. Start out by coloring the background orange, yellow, and white. Then, draw the outlines of the bodies for all of the characters in the family. After this, draw in the details, giving them a 3D type of image. Next, you will color in the clothing and add in the fine details for the hair and the face as well. Erase any background lines from the drawing to clean it up, then add in some shading to make it look more realistic. To finish this, ...

How To: Draw curvy steps using pencil
In this tutorial, we learn how to draw curvy steps using pencil. To start, you will draw a thin horizontal line with a small point on it. After this, you will draw lines out from this, using a ruler to keep them straight. From here, draw your steps on the bottom of the page using the lines to keep them proportioned and in place. Draw them in a triangle wedge shape and then color them in. Shade the bottom and the sides to give them depth and dimension. After this, draw in the area around the s...

How To: Draw the female body
In this tutorial, we learn how to draw the female body. First, you will draw the outline of the body, starting with the basics. Then, start to shade in the different areas of the body and create contours. Make sure to draw longer and leaner lines to create a more feminine figure. Draw in her hips and make her body curvy, not just one straight line. After this, add in lines to the body to make it look more realistic and show the contours. To finish this, add in white for lighting and then cont...

How To: Draw Sonic the Hedgehog in his soap shoes
In this video, we learn how to draw Sonic the Hedgehog in his soap shoes. First, draw his muzzle and nose. After this, draw in angry teeth in the mouth and then draw in the eyes and the ears. From here, you will draw in the rest of the spiky hair around the head. After this, draw on the arms and legs, as well as the feet and shoes. The shoes should be larger than the entire body and have lots of details on them. When finished, add in shading around Sonic with the side of the pencil to give hi...

How To: Understand the anatomy of the arm for drawing
In this tutorial we learn the anatomy of the arm for drawing. Although you may look at an image that you want to draw, drawing it is completely different with pen and paper. Learn the different types of bones that are in the arm to get a better idea of where they should be located at. Once you draw the joints and the bones, then you can connect them all and have far more details. It may take you a long time to understand how to draw the arm and all the parts, but you will gain a lot of knowle...

How To: Draw a plan view
In this tutorial, we learn how to draw a plan view. To start, you will draw a horizontal line with a point in the middle. After this, draw lines from the point where you want to draw the buildings in the picture. Then, draw boxes inside the lines that you drew out. Then, you will draw in vertical lines on the bottom of the page, which will act as the ground. Around this, draw circles with scalloped edges for the trees. From here, draw in the rest of the details for the buildings. Finish this ...

How To: Draw a human skull
In this tutorial, we learn how to draw a human skull. To start, you will use your pencil to draw a light outline of the skull on your paper. After this, you will start to add in more shading and lines throughout the face to make it look like it has depth and contours. From here, you will draw in the teeth and then create the nose and the pits for the eyes. After this, you will start to shade in the sides of the skull darker and then add in any additional details like small cracks on the face....

How To: Draw a plan view with art markers
In this tutorial, we learn how to draw a plan view with art markers. First, you will draw a dot in the center of the paper and then draw lines out from here. After this, use the lines on the paper to create the proportions for the buildings. After this, draw in squares and lines to help create the ground and buildings. Then, you will add in details to the building and then draw in plants and grass around the edges. After this, erase any background lines from the drawing and then color it in. ...

How To: Draw roses
This video will show you how to draw roses in MS Paint or using a pencil, a marker, a sheet of paper and some colors. Just follow these instructions from the video. The first thing that you will need to draw is the sketch of it. Complete the tulpin with all the details just like in the video and continue it with the flower. Now make two more flowers and now you can use the marker over the sketch. The last thing to do is to color the drawing with the colors used in the video. And now you're done.
How To: Draw the cartoon characters from Teen Titans
In this tutorial, we learn how to draw the cartoon Teen Titans. Start off by drawing the basic outlines of all the characters. Use circles and basic lines to draw out the outlines of them all standing together. From here, draw in the color for the background behind them, then start adding in details for each of the characters. Draw in each of their outfits, as well as facial features. Use lines and shading to make the characters look more realistic. Color them with the appropriate colors for ...
How To: Draw braided hair
In this tutorial, we learn how to draw braided hair. Start off using grid paper and a pencil to practice. Then, draw two lines parallel together and draw a line in between each of those. From here, draw on a circle around these and continue the pattern all the way down until you reach the end of the lines. Then, draw a line in the center where the circles meet and start to shade in the area to the right, creating a line coming out of it from the left. Practice doing this to get a better idea ...
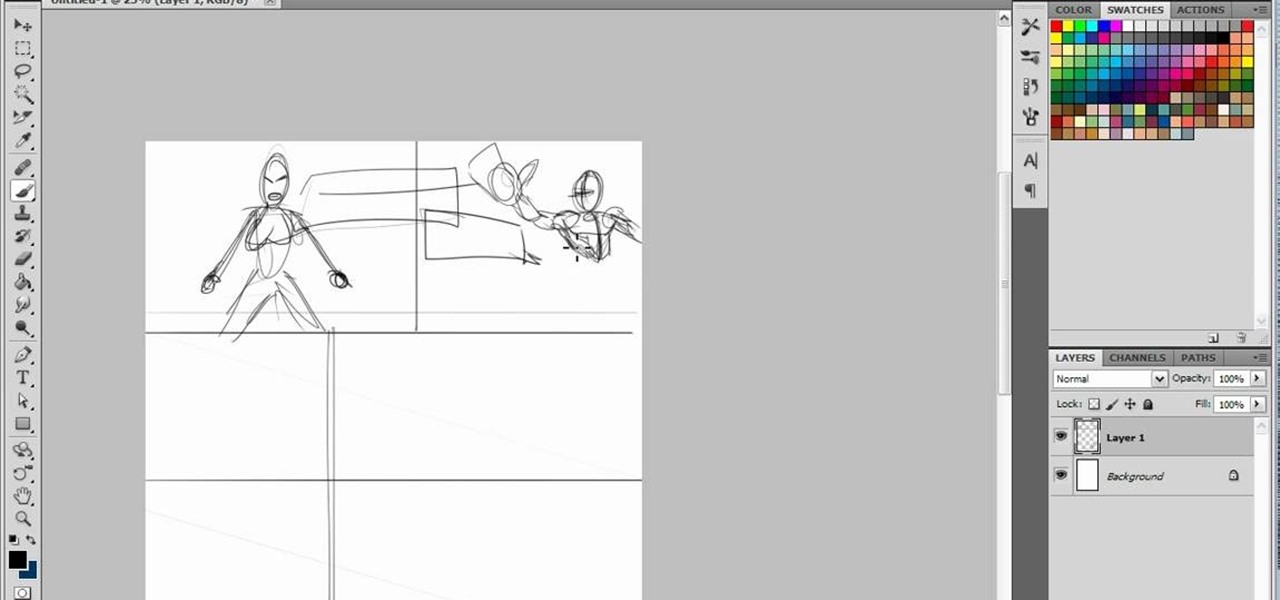
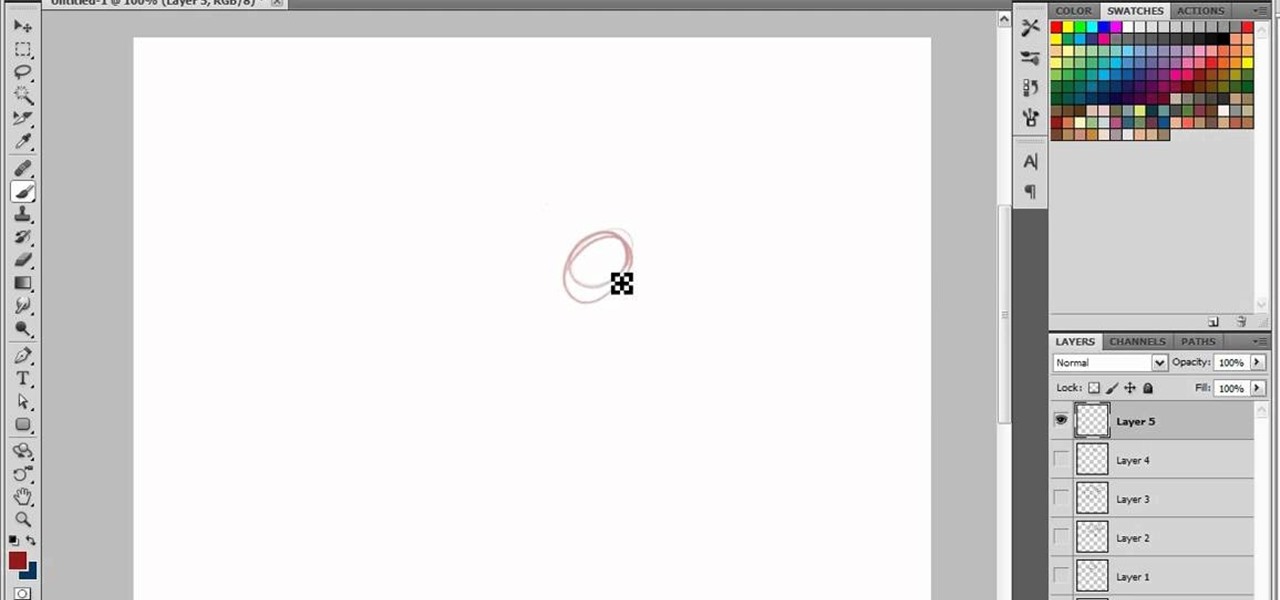
How To: Layout a comic page like a professional
Layout is an important step in setting up your comic, to make sure each frame has the maximum impact. This tutorial goes over how you can start with a sketch in Photoshop and work on your layout for each comic page you're making.

How To: Draw a woman in jeans with Adobe Photoshop
This Photoshop tutorial has a very specific purpose - to teach you how to draw a woman from the back who is wearing jeans, a skirt or even nothing at all. Master the curves of a woman's backside using the techniques outlined in this video.
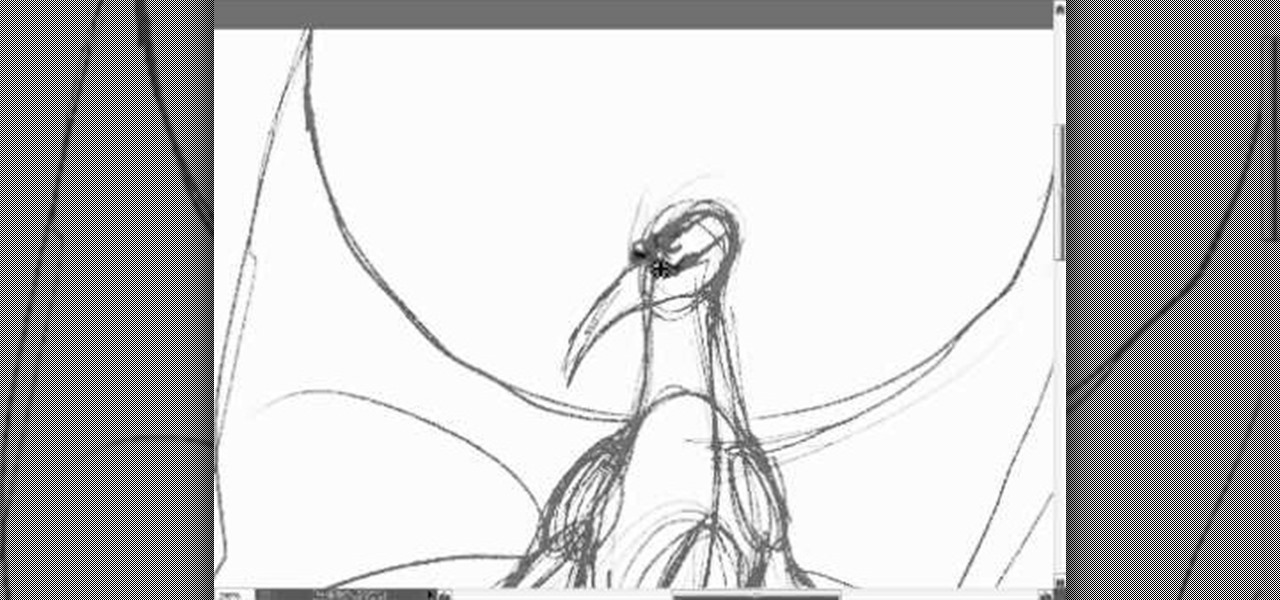
How To: Draw a fantasy dragon in Adobe Photoshop
Want to start drawing fantasy art? This tutorial shows you how to start in Adobe Photoshop and draw an imposing fantasy style dragon. Make sure you get all the scales, wings, claws and other features correct for your digital drawing!
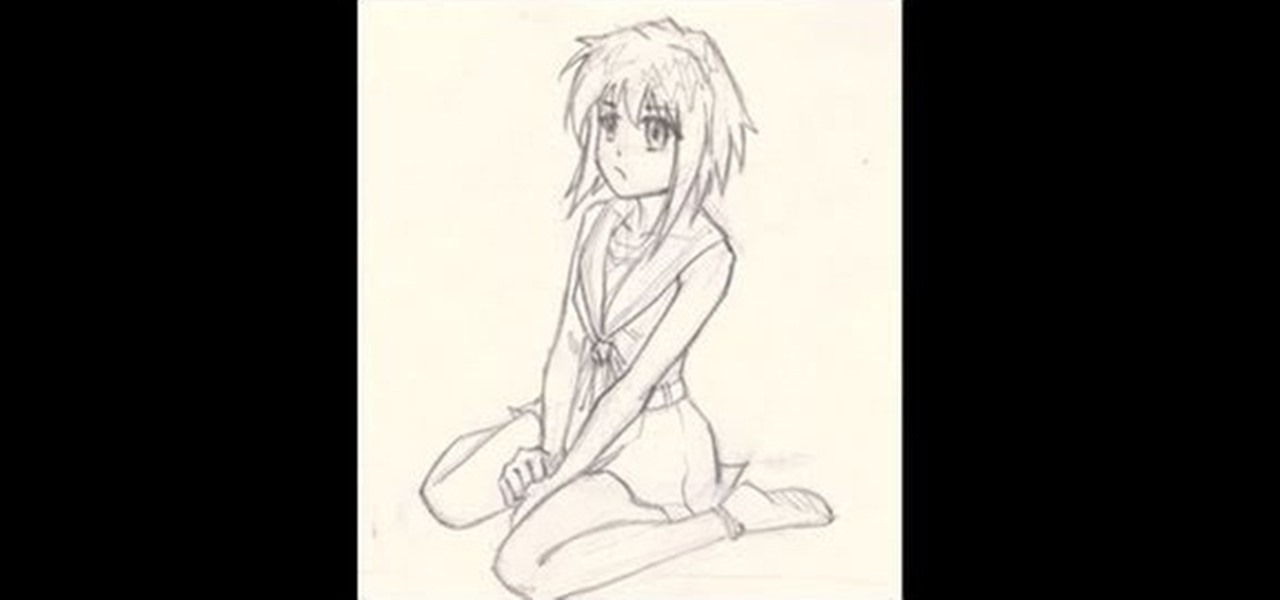
How To: Draw a pencil sketch of an anime-style girl sitting down
This tutorial shows you one way to draw your anime girls - to show them sitting down. The video also goes over the proper use of perspective to make your drawing more realistic. Just follow along with this step by step and add to your anime portfolio!
How To: Draw the face of an anime style girl in three quarter view
This is a very basic tutorial for those interested in learning how to draw anime girls, focusing on how to draw their face in a 3/4 profile. Follow along with this easy tutorial, using a pencil and paper to show you this simple anime technique.
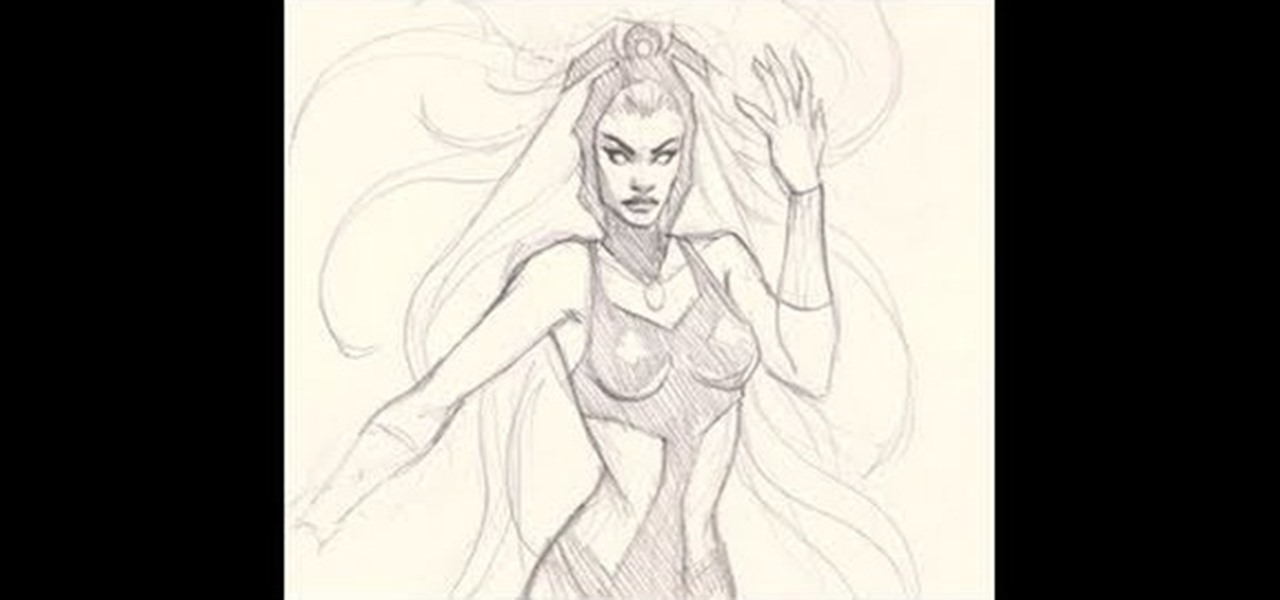
How To: Draw a pencil sketch of Storm from the X-Men comic books
Storm is a popular superhero in the X-men comic books who has control over the wind and weather, and this tutorial shows you how to draw a pencil sketch of her. You'll become an artist like Stan Lee in no time!
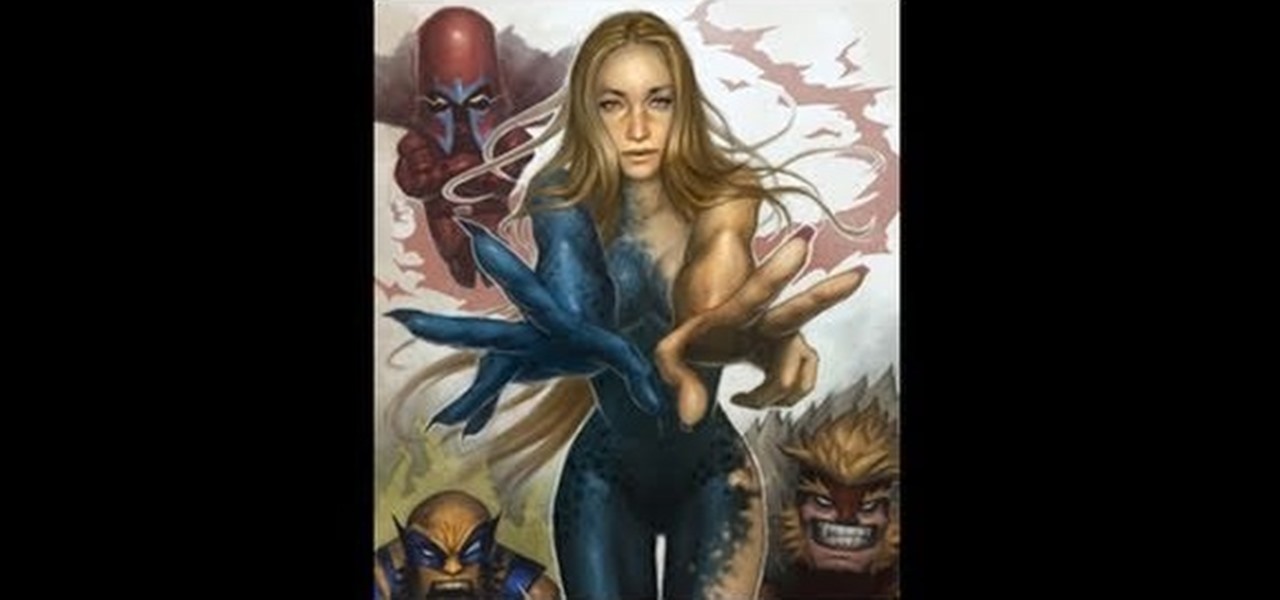
How To: Create a digital painting of the X-Men superhero Mystique
This step by step tutorial shows you how to start with a blank file and then go step by step to create a digital painting of the X-Men superhero Mystique. It pays special attention to details like her hair and her unique skin texture.
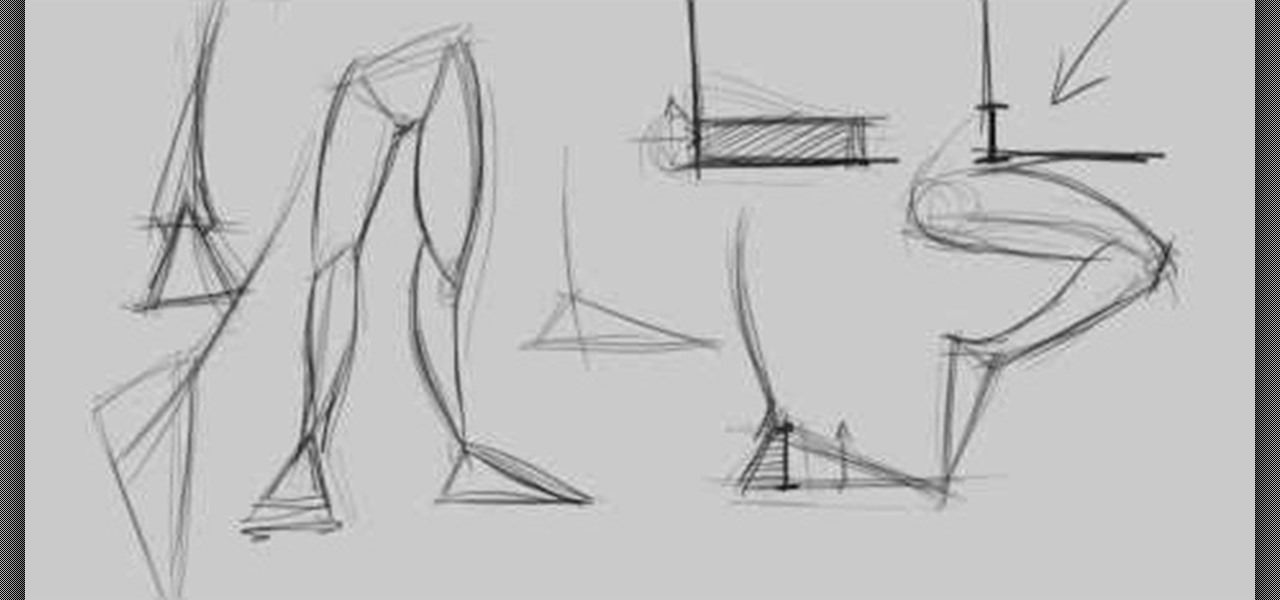
How To: Draw feet using digital drawing software like Photoshop
This two part tutorial is all feet, all the time. Done in the comic book style, this tutorial shows you how to expand on the basic triangle to draw realistic and proportionate feet, as well as avoid some of the pitfalls new artists encounter when trying to master feet for themselves.
How To: Create a digital drawing of characters wrestling with each other
Here's another tutorial which shows you how to draw characters interacting with each other, specifically wrestling. This tutorial shows you how precisely how to draw interlinked limbs or touching bodies for greater realism using wrestling positions as the base of inspiration.
How To: Draw the main body of an anime or manga style girl
This is a quick tutorial which nevertheless will teach you how how to properly draw the body of an anime or manga style girl. Break everything down into geometric shapes and then make small alterations to your shapes for your figures and drawings.

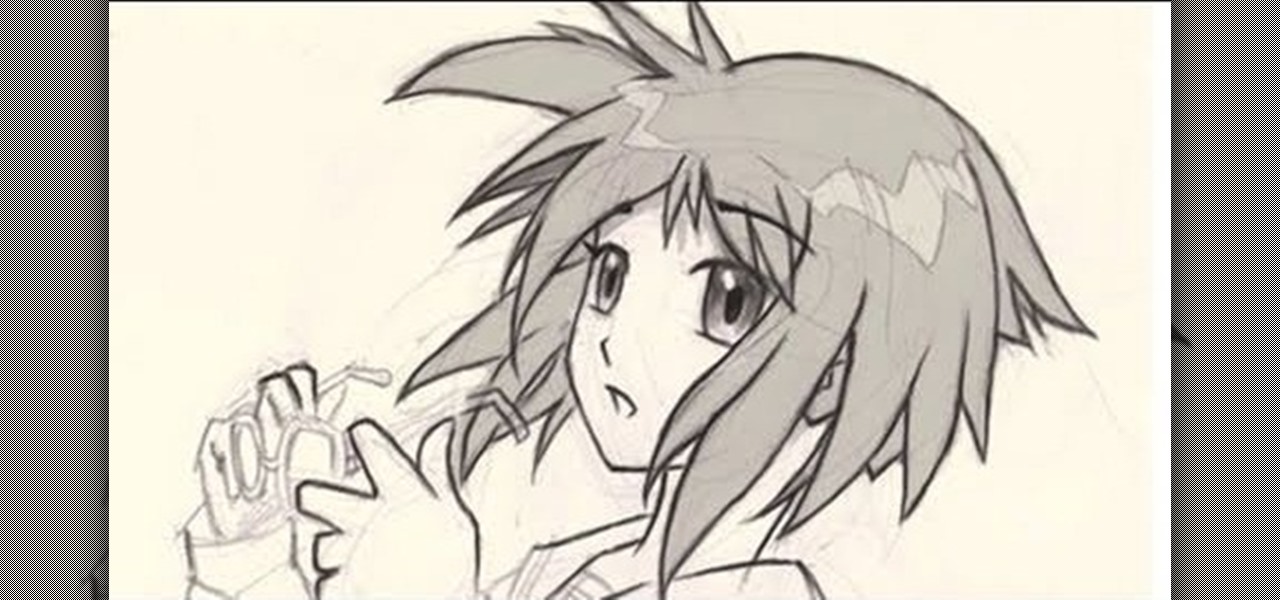
How To: Draw the hands of anime or manga style girls
This video focuses on drawing the hands of anime girls. It also covers foreshortening, and how to accurately depict hands when using this technique. Use this technique when you want to emphasize your character's hands, such as when she gets into a fight.
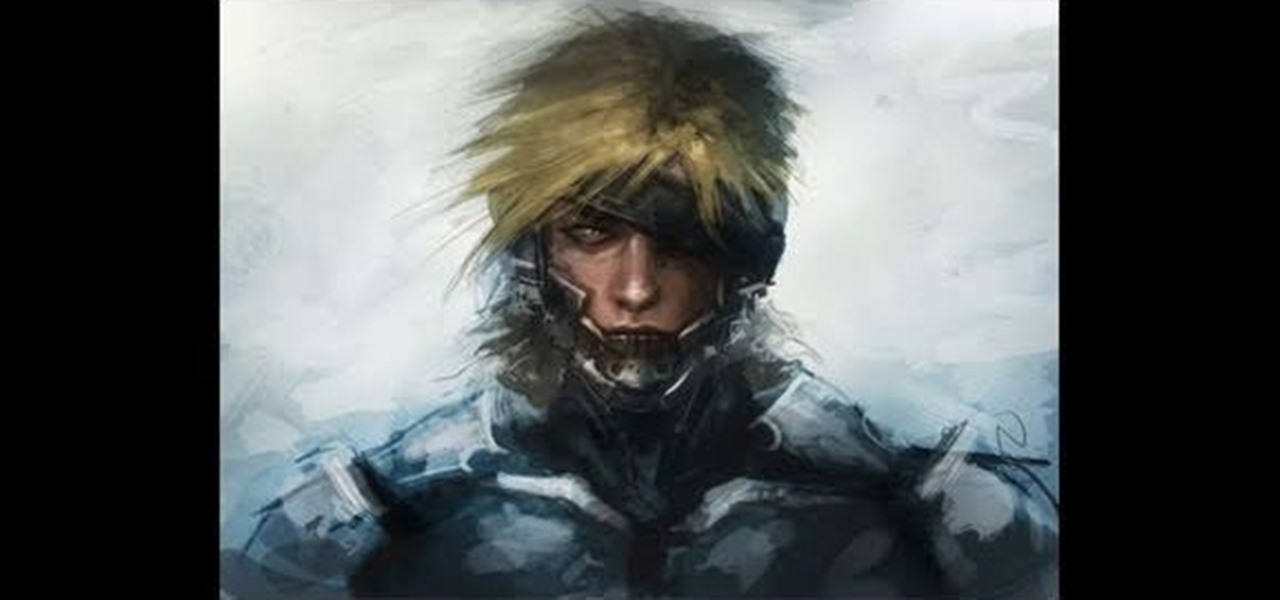
How To: Create a digital painting of the Metal Gear Solid character Raiden
This tutorial shows you how to use your favorite drawing or art program (like Photoshop or GIMP) to create your own digital painting of Raiden, a character from the popular video game Metal Gear Solid. After creating the basic sketch, this video shows you how to create your own painting.

How To: Draw and color in a simple castle for kids
This basic drawing tutorial is aimed at young children who want to learn how to draw a very basic castle, with one middle tower and two smaller turrets off to the side. Follow along with your child - all you'll need is some paper, a pencil with an eraser and a few markers!
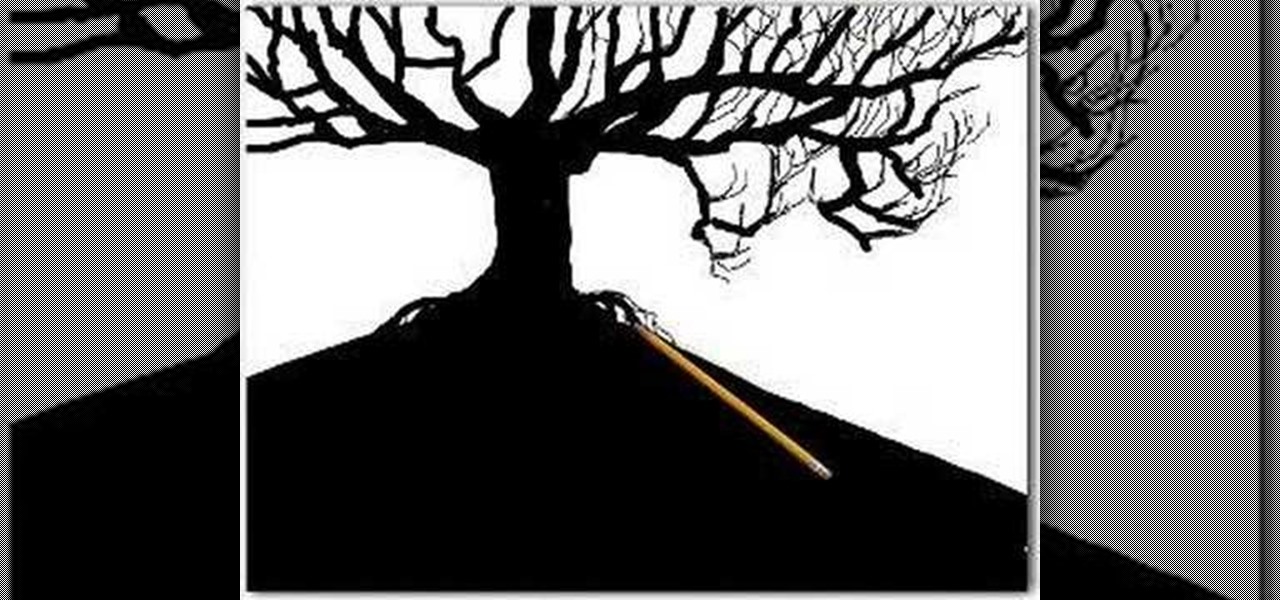
How To: Draw a tree using an additive method
Whether you are pursuing drawing as a professional or as a hobby or you are just a common person, we're pretty sure that you have drawn a tree somewhere in your lifetime. This video merely shows how to do the same in a better way. Though there is no narration (just background music) in this video, it is easy to understand the additive method of drawing. The artist starts off with a broad tree trunk and then starts adding thinner branches to the trunk that spread outwards. Then, even more thin...
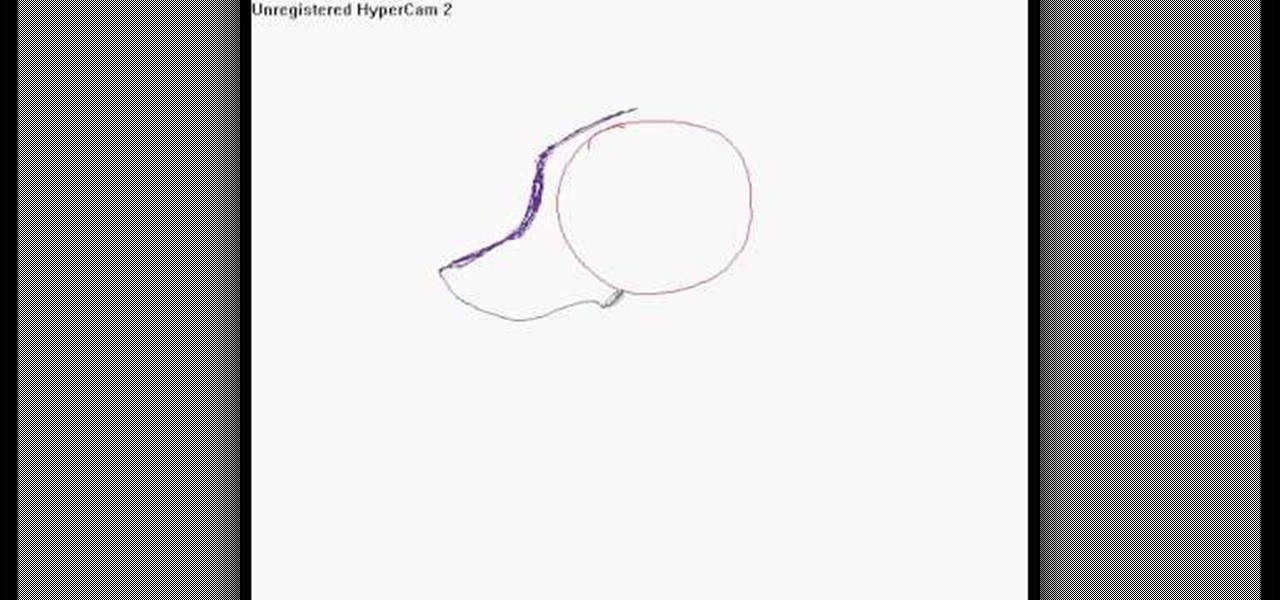
How To: Draw wolf eyes
In this video, we learn how to draw wolf eyes. Start out by drawing the outline for the wolf head. Then you will draw the eyes in an almond shape dragging downward on the nose. After this, zoom in on the eyes with the computer and then fill in darker lines around the eyes. Draw in the pupils on the eyes and add in the details for the corners of the eyes as well. If you want to draw wolf eyes from a side view, draw the outline of the head to give you reference, then draw the shape of one of th...

How To: Draw manga/anime clothes and folds
In this video we learn how to draw manga/anime clothes and folds. Start out by drawing the collar of the clothing up and around the neck. As you draw down, make sure you add in a bump for the elbows in a long sleeve shirt. Then, draw in the cuffs for the shirt and add in lines on them. Draw down from the elbow bump, creating two bumps near the wrist to show a baggy sweater. Make sure to add in the small details like zippers and strings on the top. Finish off the sides, leaving a gap between t...
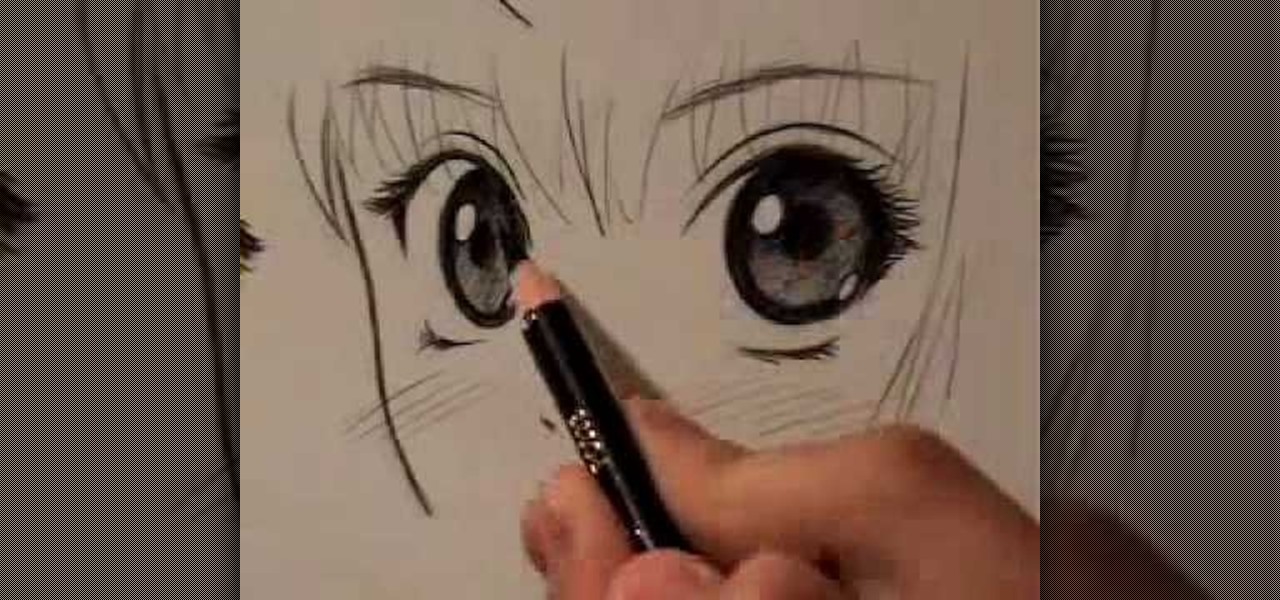
How To: Draw manga eyes in 4 different ways
In this video, we learn how to draw manga eyes in 4 different ways. The first one is a wide eyed look where you will draw large eye and then create the pupil towards the top of the eye. Draw in the lids and the top and bottom of the eye high around it. Then, for a female eye, you will need to draw in a large eye as well. But, with these you will draw in the lashes of the eyes on both the top and the bottom. For smaller eyes, you can draw them tall but make them thinner. Crosshatch the eyes to...
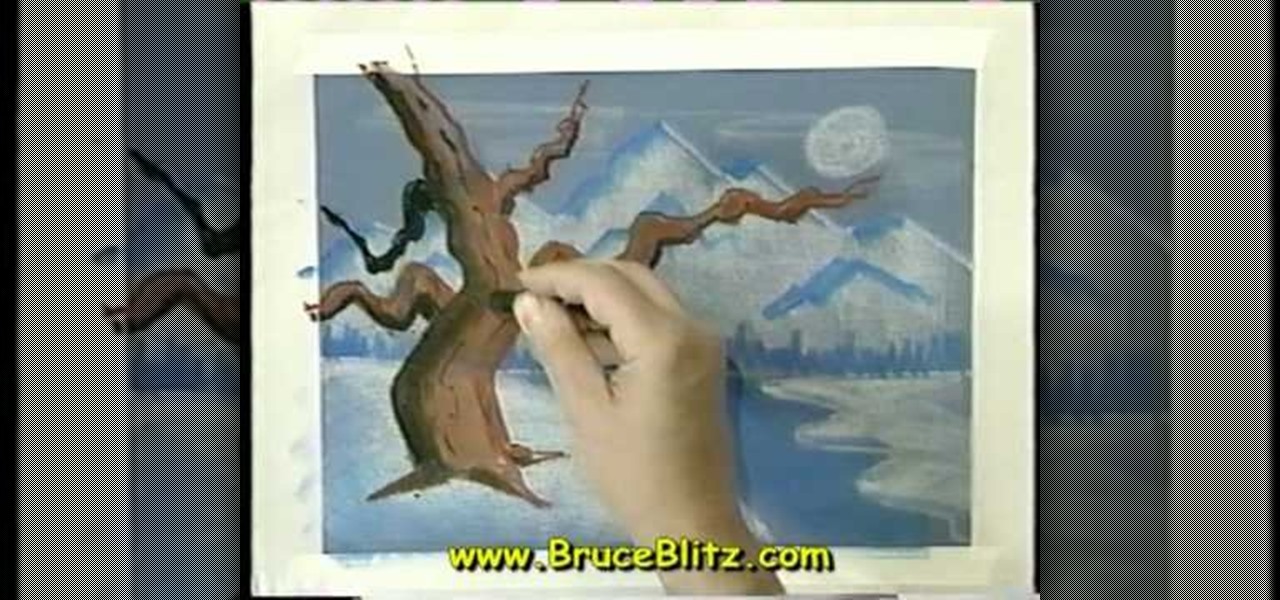
How To: Draw a tree in moonlight
In this tutorial, we learn how to draw a tree in moonlight with Bruce Blitz. Start out by using a gray piece of paper. Then, draw arrows on the page towards the top that will act as your mountain peaks. Draw in additional lines to show that the mountains are towards the top. Shade in the tops of them and then draw a river with water at the bottom of the page. After this, draw in trees at the bottom of the mountain and a moon in the upper right hand corner. Use white chalk to create the effect...
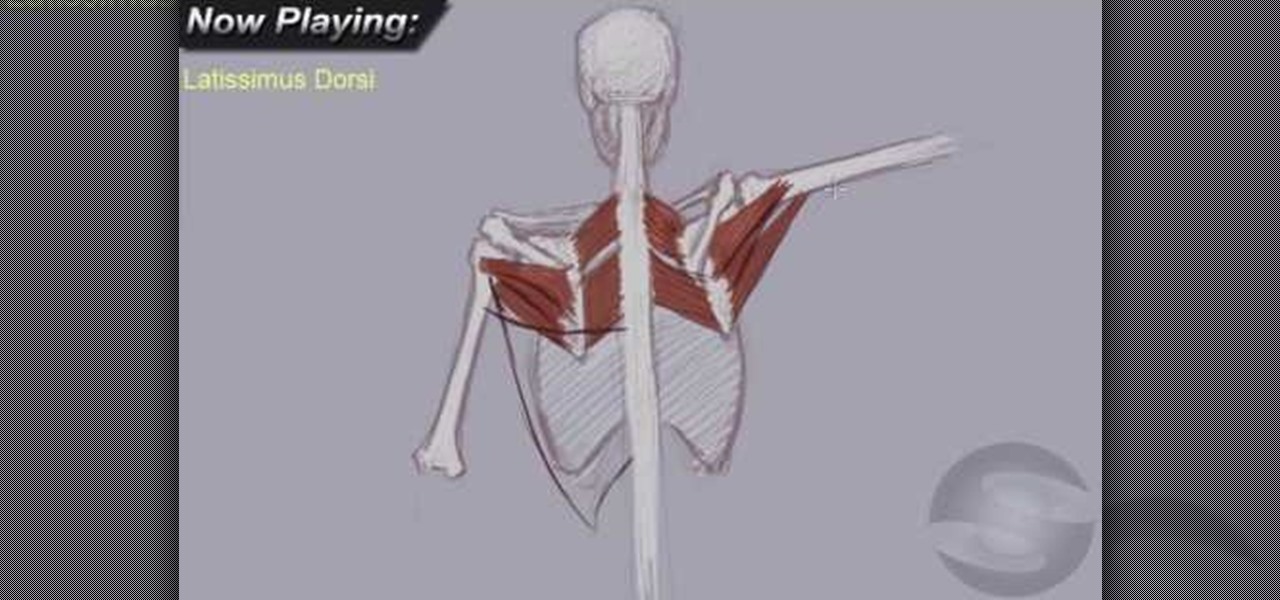
How To: Understand the anatomy of the upper back for drawing
In this video, we learn how to understand the anatomy of the upper back for drawing. First, you will need to learn how to draw the skeletal block of the body. Once you have drawn the outline for the skeleton, you can continue onto the rest. Make sure to add in the details for all the parts of the body, using thin lines at first, then thicker lines. Color these in white once you have the bone shapes made, then color in the "meat" on top of those. Draw in lines to create shading and realism on ...