

Drawing & Illustration How-Tos


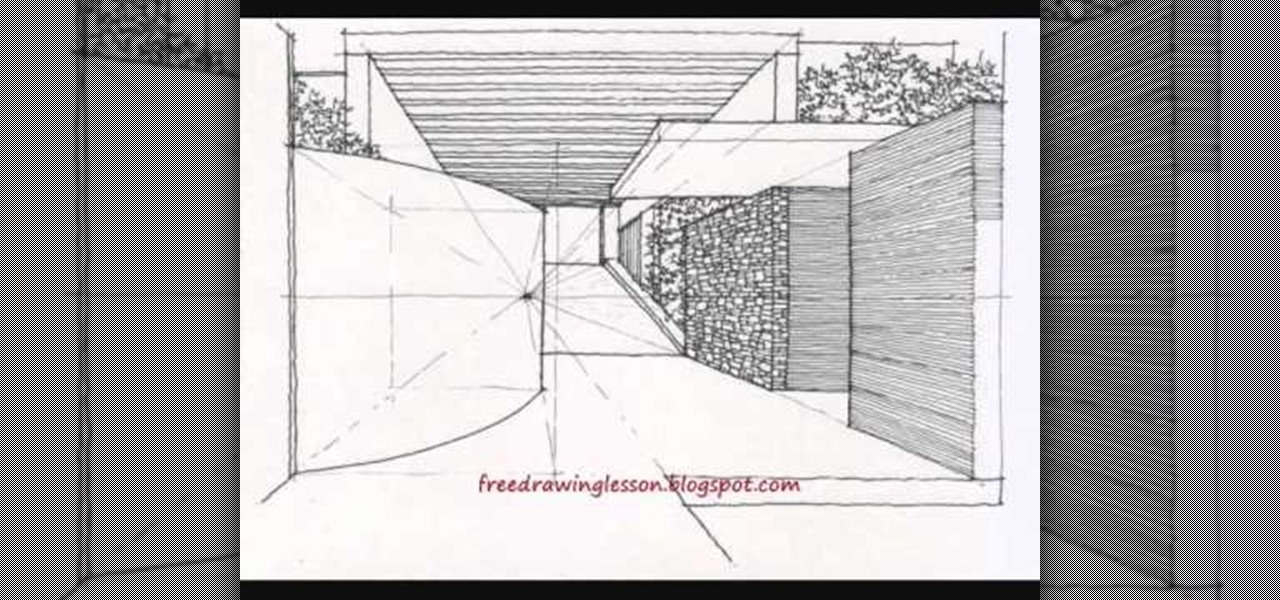
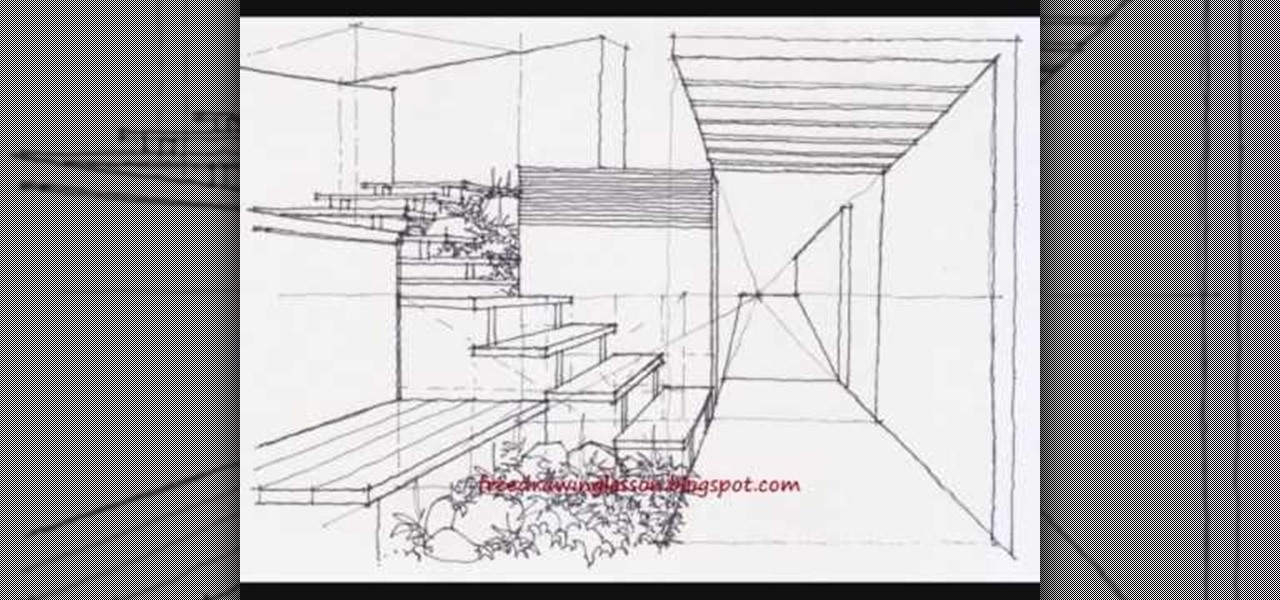
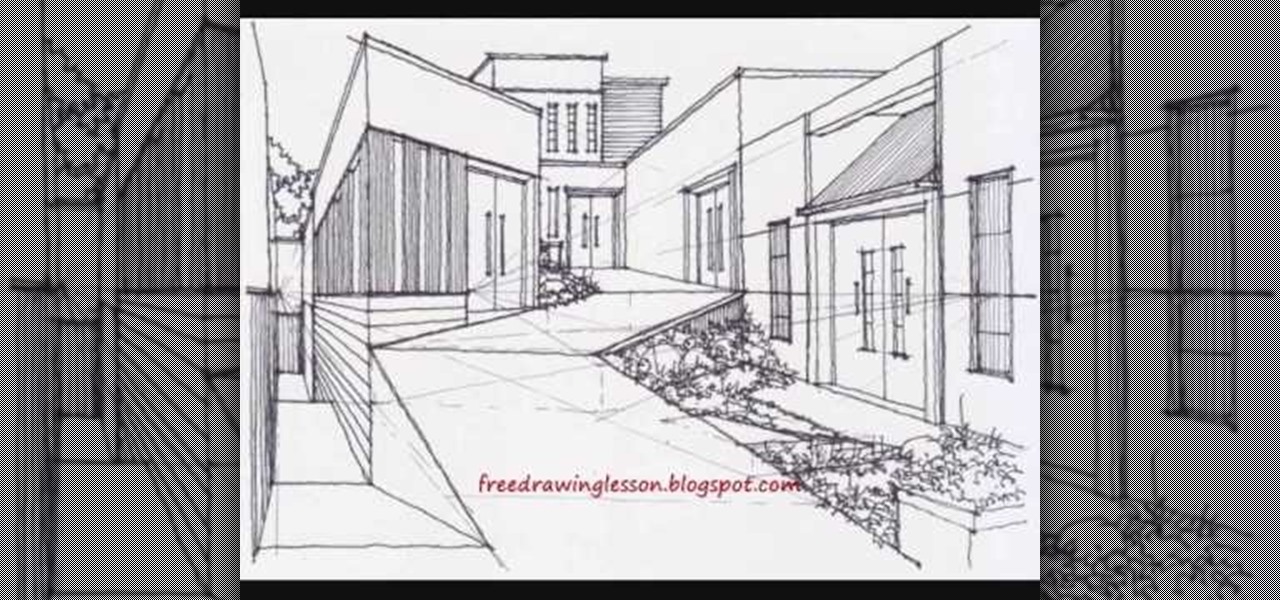
How To: Draw an entryway space using complex space
If you need to refine your building draftsmanship for architecture school or simply because you enjoy the streamlined aesthetics of modern architecture, then this tutorial is a perfect way to practice and hone the art of architectural drawing.

How To: Draw a city full of skyscrapers and tall buildings
Maybe it's just us, but this city reminds us a lot of the dreamscape Parisian city from Cristopher Nolan's mind heist movie "Inception," aside from the whole city folding back over itself thing and whatnot.

How To: Create realistic looking drawings and paintings
Merrill offers up some of this best tips for making your works of art more realistic. There's three very important strategies for improving your the lifelike quality of your drawings and paintings, and in this video, he demonstrates them for you.
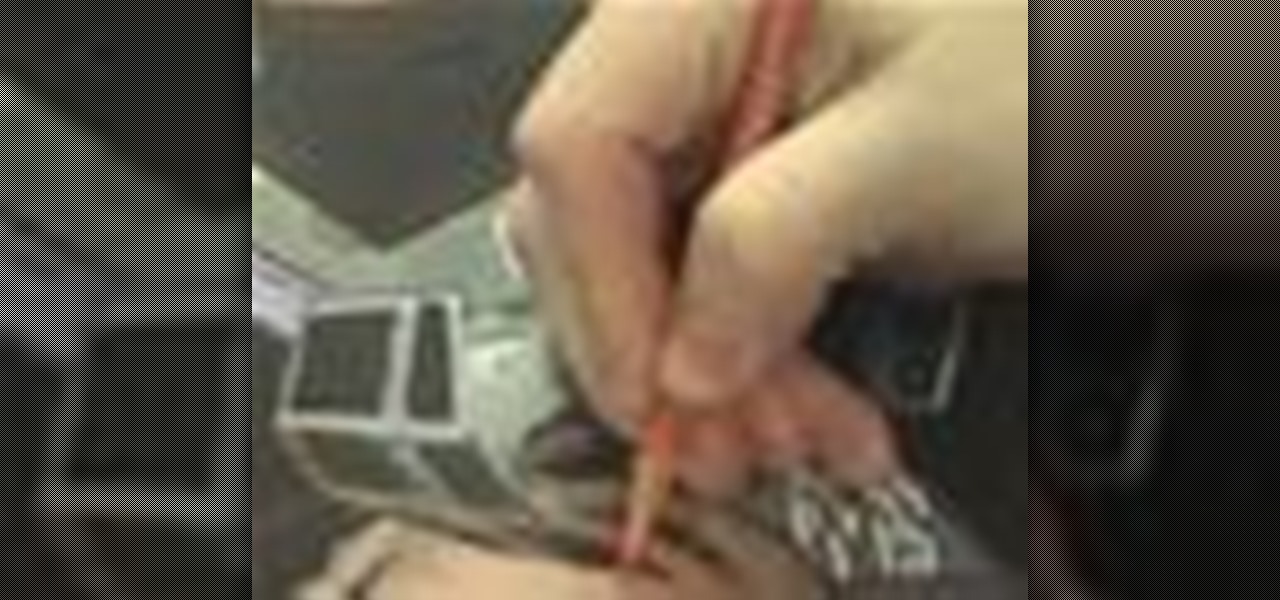
How To: Trace a picture accurately of an apartment complex
Imitation is the best form of flattery, right? In the case of this picture of a roadside apartment complex, imitation will help you learn about perspective and vanishing points, and how architectural features align with these two drawing caveats to create a realistic picture.
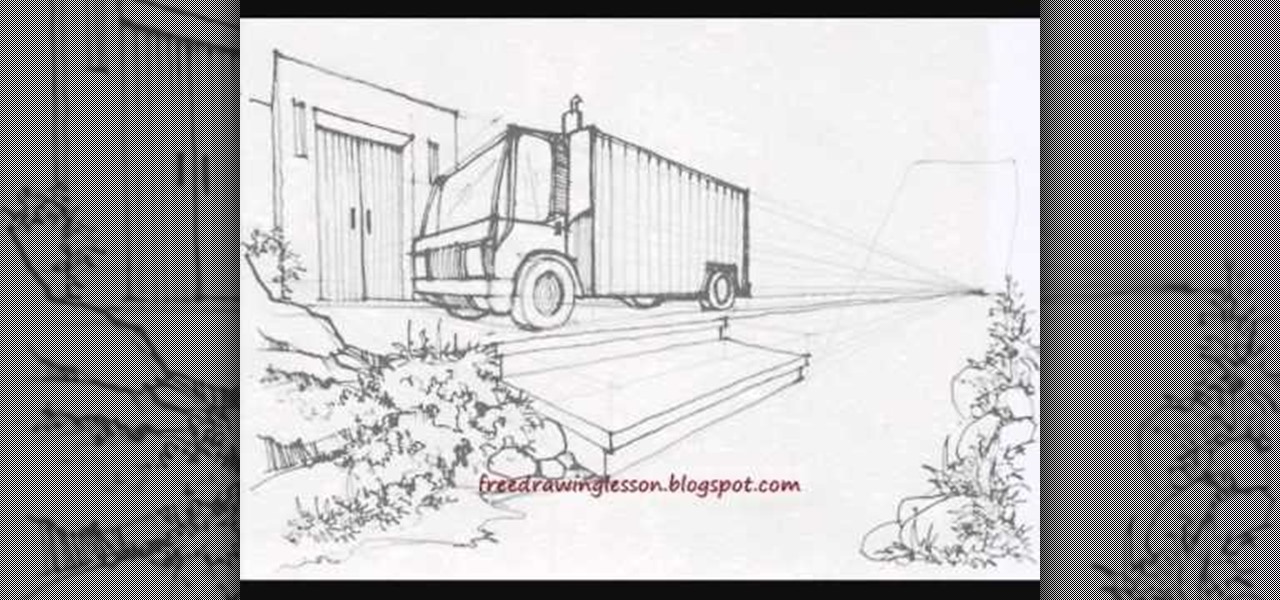
How To: Draw a large truck under a bridge with shading
Sometimes the most common, everyday subjects are also the best for practicing basic drawing methods like drafting and shading and contouring. Just take the truck, people, bridge, and garden in this drawing tutorial, for instance.
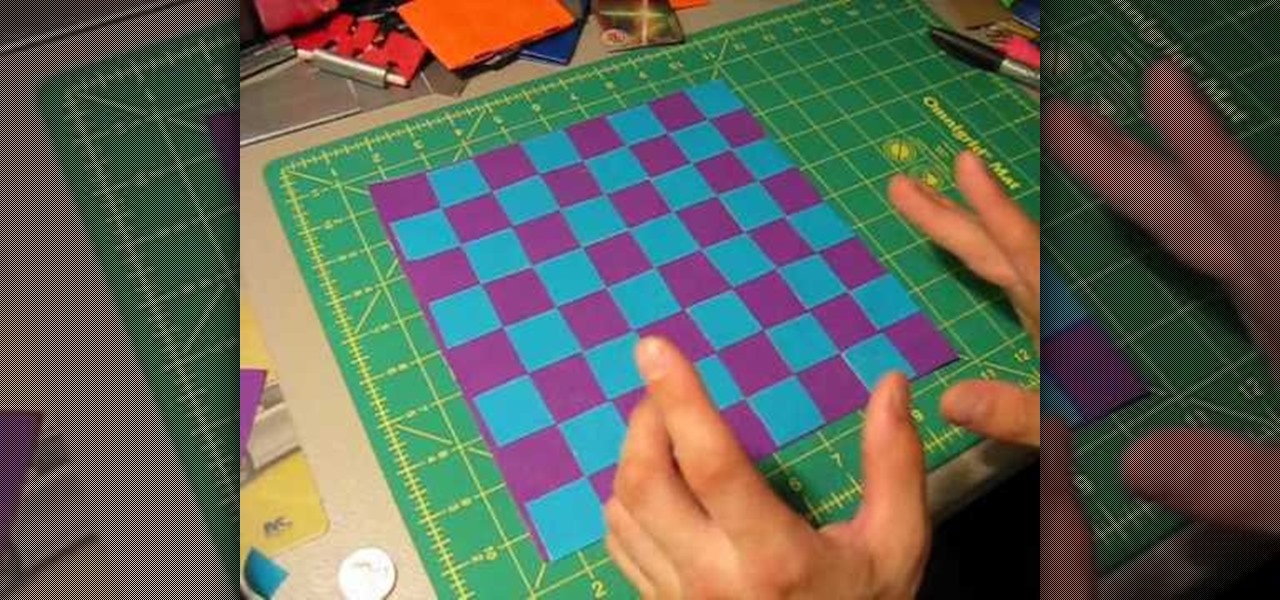
How To: Make a duct tape checkerboard/chessboard easily
Think you still need to purchase all your games at the store? If you have two differently colored duct tapes, then you can actually craft your own chessboard or checkerboard easily.
How To: Draw a buxom Frank Frazetta style vampirella
Illustrator Frank Frazetta knew women. At least, he knew what men desired in the "perfect" woman physically: Sumptuous curves that made men weak in the knees with a single shake, deep-set eyes, and bombshell assets.
How To: Draw illusionistic stairway steps with balls
Perhaps one of the most difficult technical challenges of drawing is creating illusionistic images, mazes, or steps. Like in the movie "Inception," illusionistic spaces involve a dream-like atmosphere and paradoxes in structure, like a neverending staircase. If you're interested in stretching the limits of your mind, go see "Inception." Just kidding. Do go see it, but also check out this drawing tutorial.

How To: Draw Captain America with correct anatomy and contouring
Now that the "Avengers" movie and the "Captain America" movie starring Chris Evans have been confirmed, fanboy hype about Marvel heroes has officially reached fever pitch. Though shooting for "Captain America" has just begun, pictures of Evans wearing his Captain American costume have surfaced, showing a very body contouring costume and a very fit Evans.
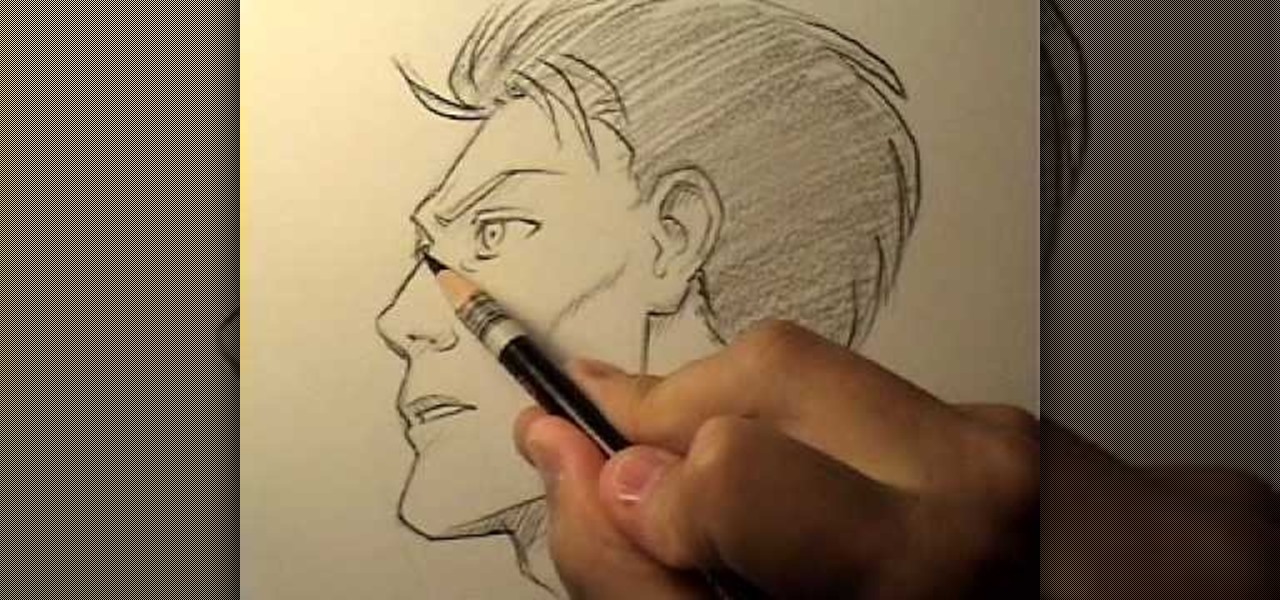
How To: Draw a realistic male manga face in profile
If you excel at drawing faces directly facing the front but can't seem to wrap your mind - and finger - around turning that face to the side and performing a profile sketch, then you're not alone. Adjusting a face to the side adds another dimension of facial contouring and structure.
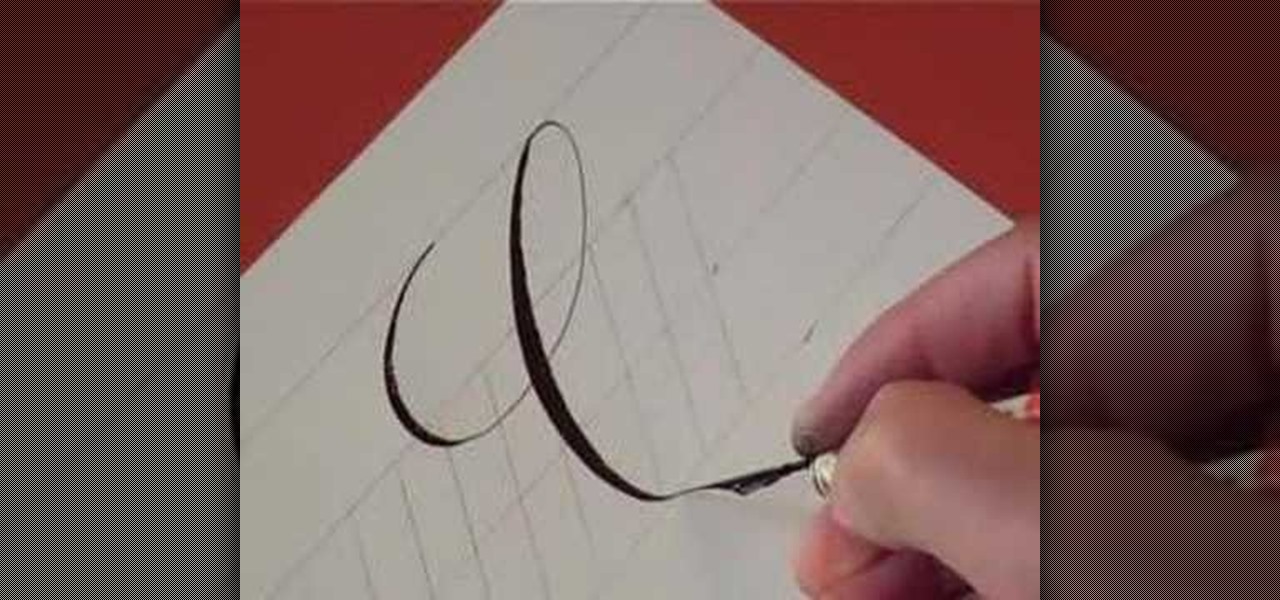
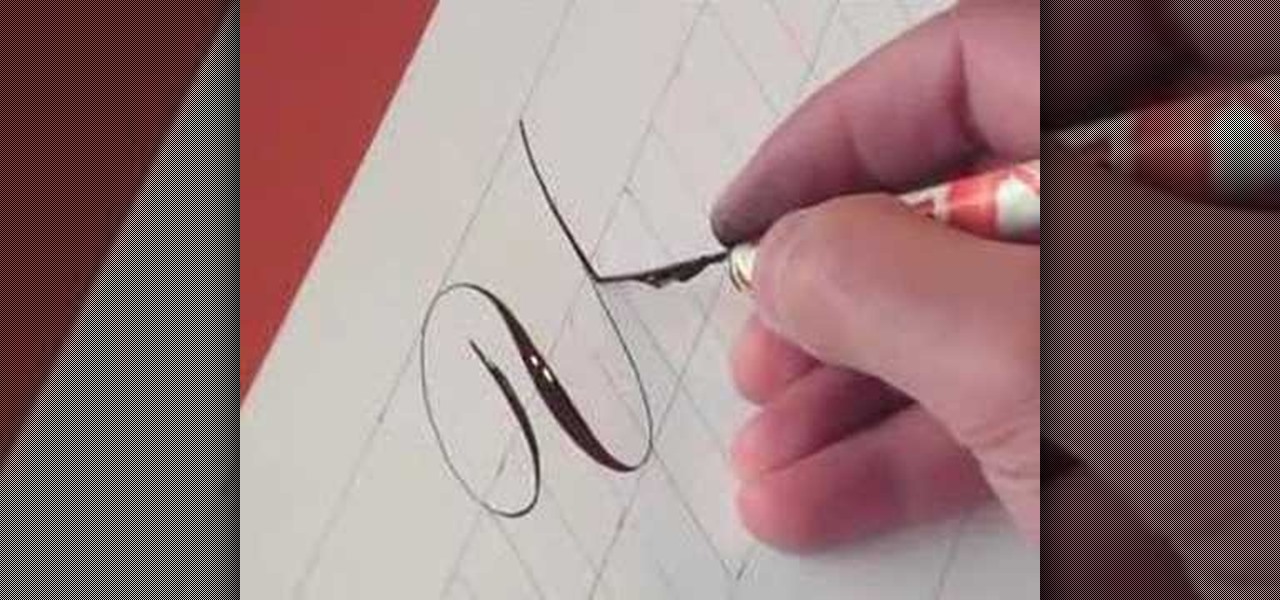
How To: Write the letter C in calligraphy copperplate
In this video, we learn how to write the letter "c" in calligraphy copperplate. First, dip your calligraphy pen into ink and start out making a large half circle on the paper. Dip the pen into ink again and make a loop with the top of the letter, then drag the pen down, making the "c" shape. End the letter with a loop on the bottom that isn't touching the inside of the letter. Make the lower case "c" by drawing the basic shape of the letter and adding a ball filled in with ink to the top of t...
How To: Write the letter D in calligraphy copperplate
In this video, we learn how to write the letter D in calligraphy copperplate. Start off by drawing a thin line down the paper, pressing on the pen harder to make a thicker line in the middle, then thinning out at the end. Drag the line to the left making a thin line, then loop it around to the front of the line and make the D shape. After you make the shape, bring the line to the back of the original line and loop it. Do make a lower case letter, make an oval shape with a thick line on the le...
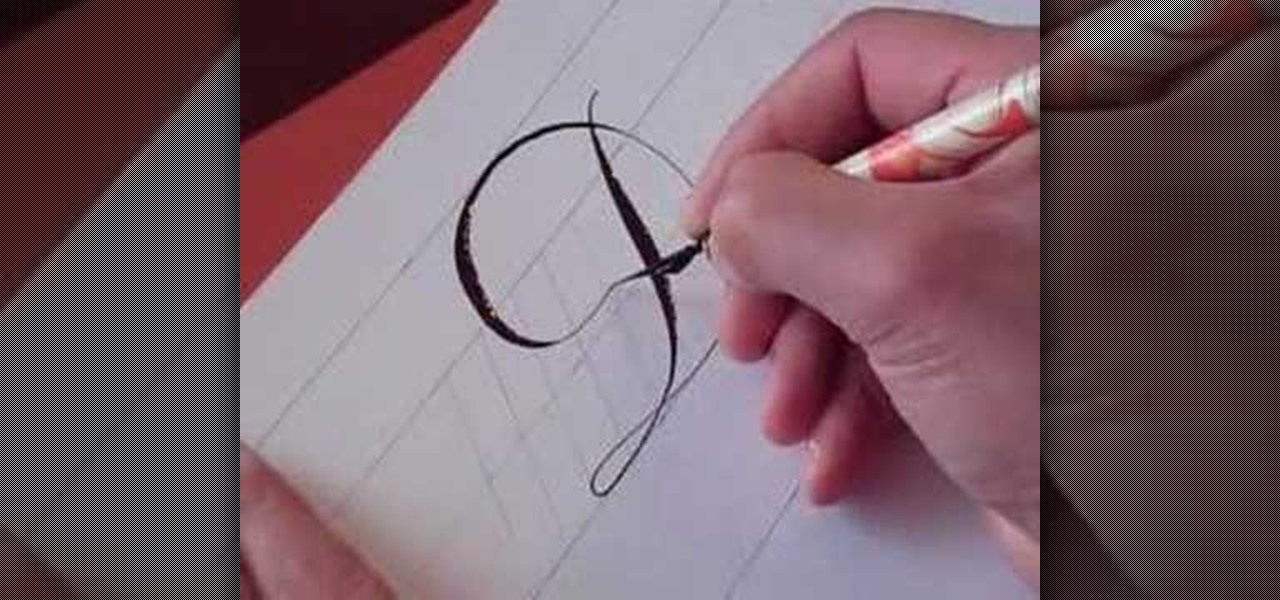
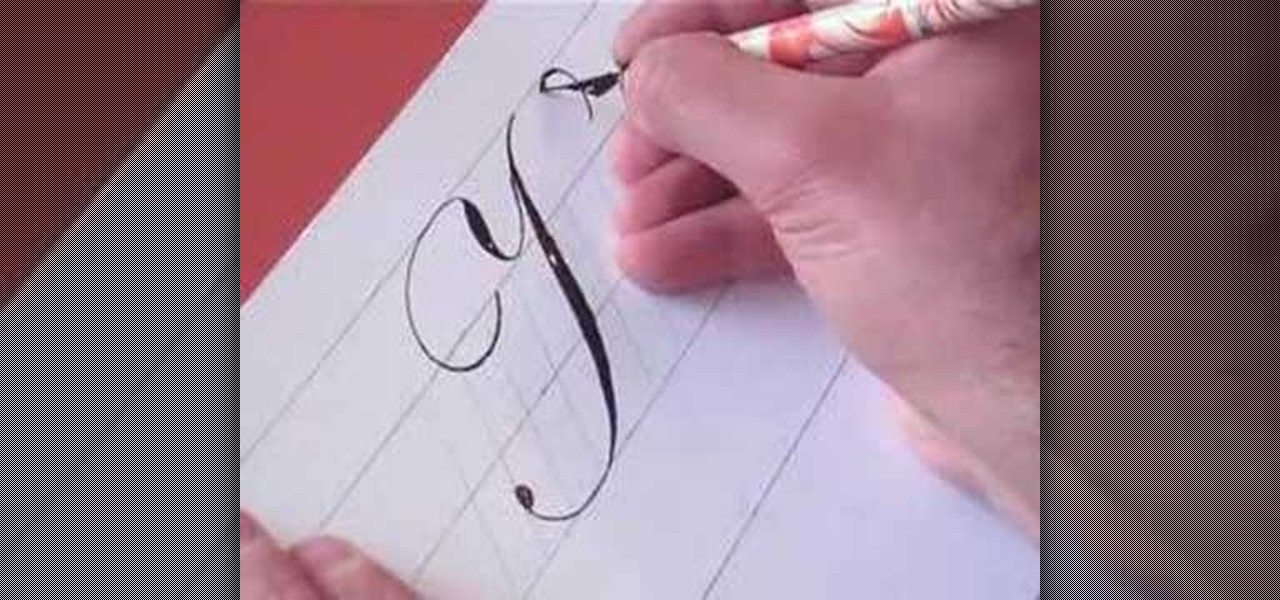
How To: Write the letter J in calligraphy copperplate
In this video, we learn how to write the letter J in calligraphy copperplate. For the uppercase letter, start by grabbing your calligraphy pen and drag it down so you have a thick black line with a thin line at the top. End the letter with a loop around it, then bring the top line to the left and loop it around, making a semi-thick line with it. To make the lower case letter, make a thin line going diagonally to the right, then dip the pen in ink and bring the pen down in a thick line down. C...
How To: Write the letter Y in calligraphy copperplate
In this tutorial, we learn how to write the letter Y in calligraphy copperplate. First, make a thin line with the pen, going thicker as you go down, make a loop and then come back down. Make a "u" shape, then connect a curved line to the other side finished with a dot on the bottom to complete the letter. To make the lower case letter, make a small thin hump, then drag the pen down to a thicker line. Make a new line on the other side, making a thicker line and connect it with the other shape ...
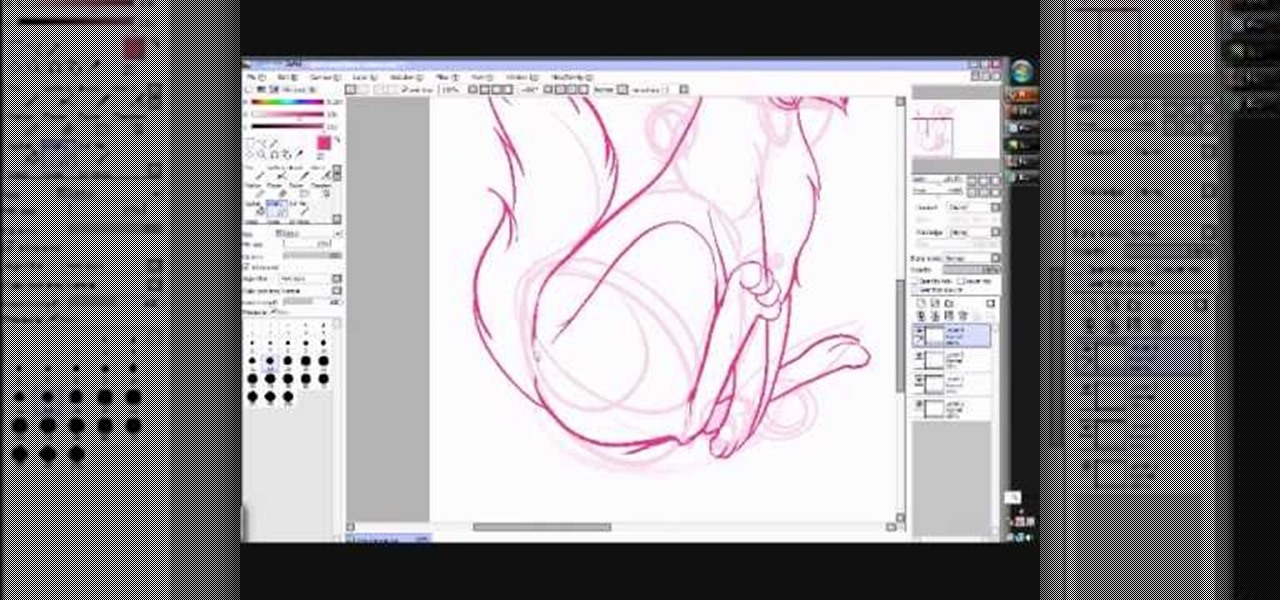
How To: Draw a manga or anime girl
In this video, we learn how to draw a manga or anime girl on the computer. Start off by drawing the torso, with the arm coming out. Have her leaning on the pillow on an incline, then draw her legs. Continue to draw up the body, making the head and hair, then the other arm. Draw in the details on the body and the face, then start to fill in with a bold tool to bring out all the features. Go over all your construction lines, then erase whatever is in the background that you don't need as a guid...

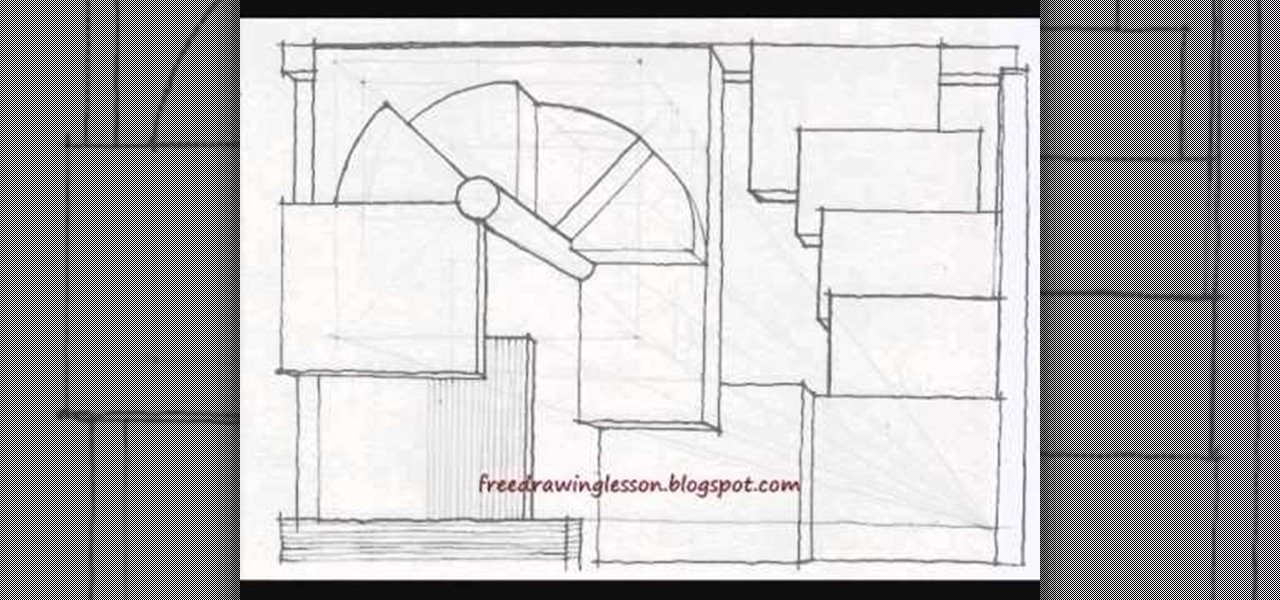
How To: Draw steps in perspective
In this tutorial, we learn how to draw steps in perspective. Start off by drawing a dot in the middle of the paper. From here, draw lines using a ruler coming from the middle diagonally on the top middle and sides. Now, you will be able to draw your pictures using these as a reference point. The lines at the top will show the steps that are at the top and farthest away the closer they get to the dot in the middle. After this, fill in the details of the picture making different items around th...

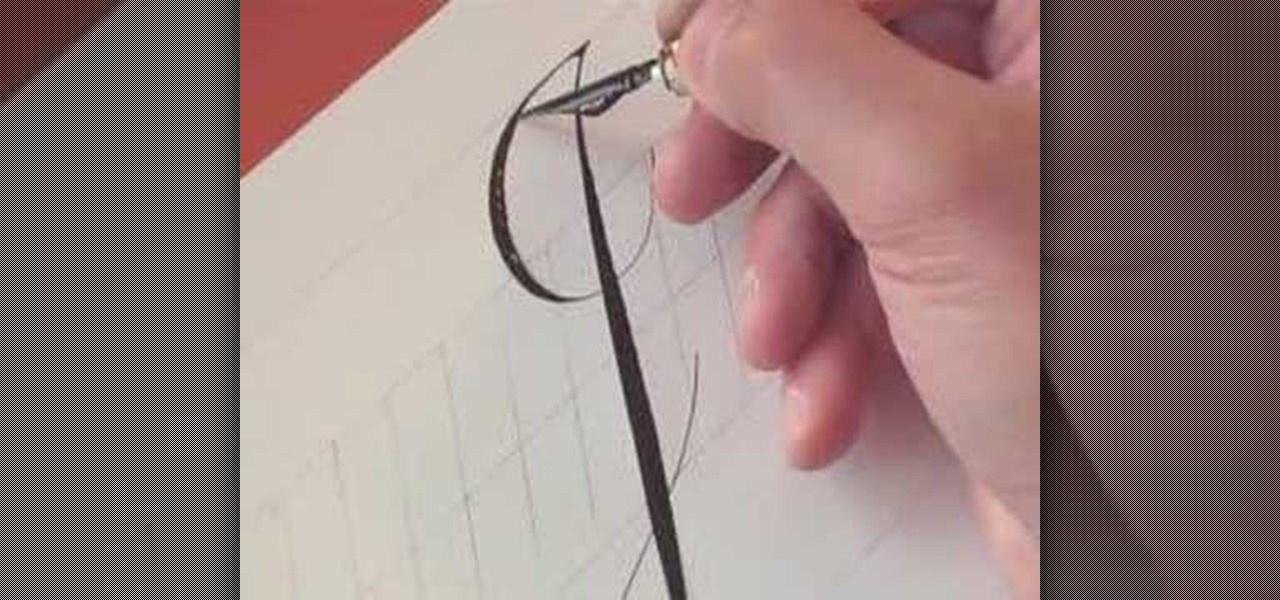
How To: Write the letter T in calligraphy copperplate
In this video, we learn how to write the letter T in calligraphy copperplate. Start by drawing a thick line that follows out a loop that curves to the left hand side. After this, create a loop at the top of the line, on the left hand side. Draw this out and cross the line over the top to make the T shape, ending with a slight curve at the end. To make the lower cased letter, draw a thin line, then draw a thick line over it, then cross a thin line across the top middle of the letter. Now you w...

How To: Draw a cartoon dragon with a big head
In this video, we learn how to draw a cartoon dragon with a big head. First, draw the outline of the dragon, making the head much larger than the body. After this, add in small details to the dragon using the light pencil mark. Next, take a bold marker and trace over the pencil lines that you made, filling in the eyes, nose, teeth, wings, tail, ears, etc. After you do this, color the dragon completely green. Then, take a darker green color and apply it to the edges and where you want shadowin...
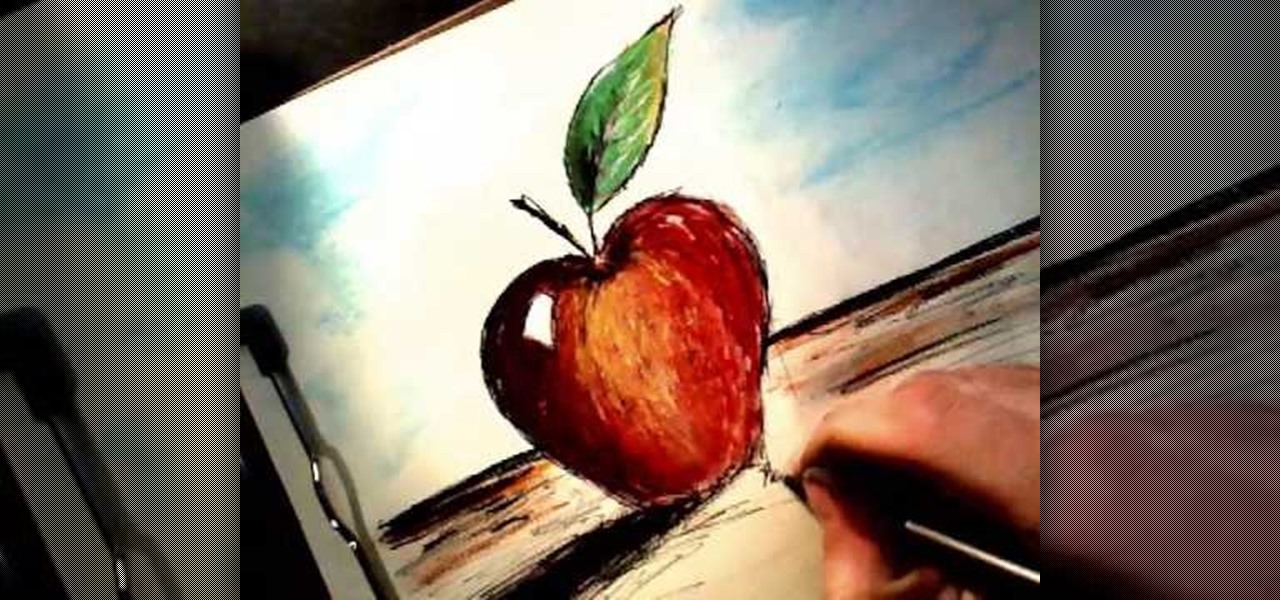
How To: Draw an apple
In this tutorial, we learn how to draw an apple. Start by drawing the outline shape of the apple. It looks like a slight heart shape in the middle of the apple where the stem is. After this, start to fill in the apple with lines to make it look more realistic, then draw the stem and a leaf coming out of the top middle of it. Color in the leaf with browns, blacks, and green. Then, draw lines on the bottom of the paper to make it look like the surface. Finish by coloring the apple red, making d...
How To: Write the letter K in calligraphy copperplate
In this video, we learn how to write the letter K in calligraphy copperplate. Start by running your calligraphy pen on the paper going from a thin line to a thick, making a line curved to the left ending with a dot at the end of a small loop. Next, make a loop to drag out across the top on the right hand side and curve it down to make the K letter. Do the same to make the lower case letter, except making a loop for the top of the letter instead. When finished, let the ink dry and you've got y...

How To: Write the letter O in calligraphy copperplate
In this video, we learn how to write the letter O in calligraphy copperplate. Take your calligraphy pen and make a medium thick half loop at the top, dragging it down into a thicker line on the left side of the word. Then, continue onto the other side of the O with a lighter touch of the pen making a very thin line, finishing with a loop in the middle. Make the smaller O just like normal, making the thick line on the side and finishing with a small loop bending out to the right at the end. Wh...
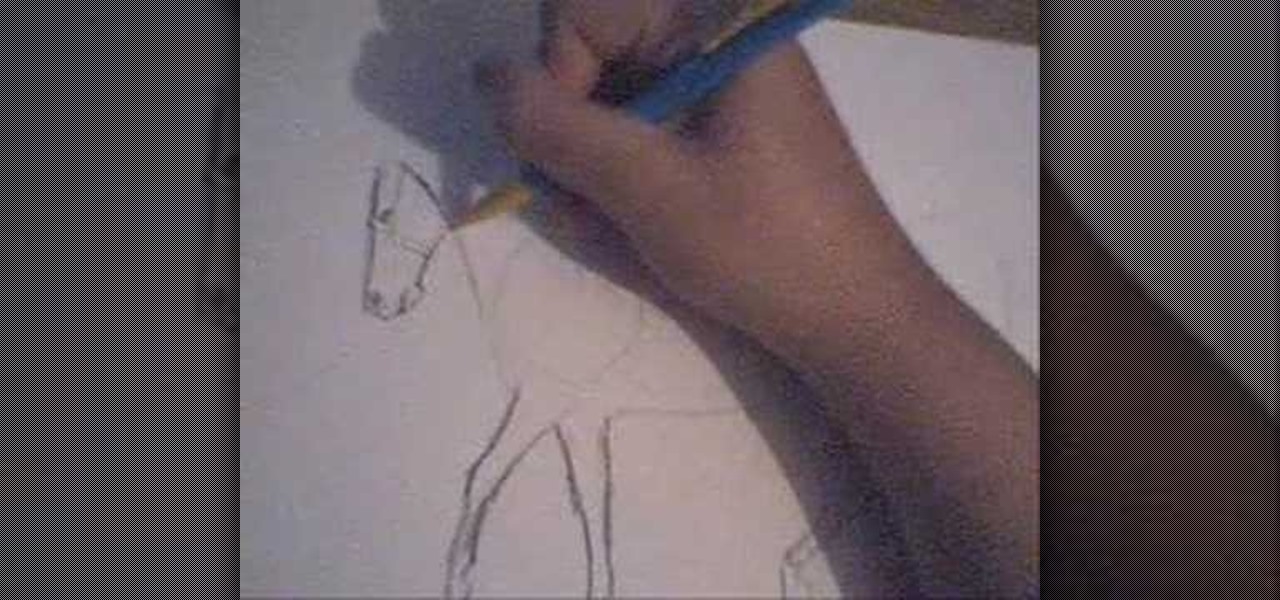
How To: Draw a horse
In this video, we learn how to draw a horse. First, draw the outline of the horse's body. Start with a circle for the head and wispy lines for the rest of the body. Make large shapes that connect to see where the mass of the body will be. Next, draw in the head, tail, back, and legs of the horse. After you have the outline finished, erased the lines inside of the picture. Now, draw in details on the horse. Add in lines to show where the hair is, then draw in the nose and eyes to the face. Als...
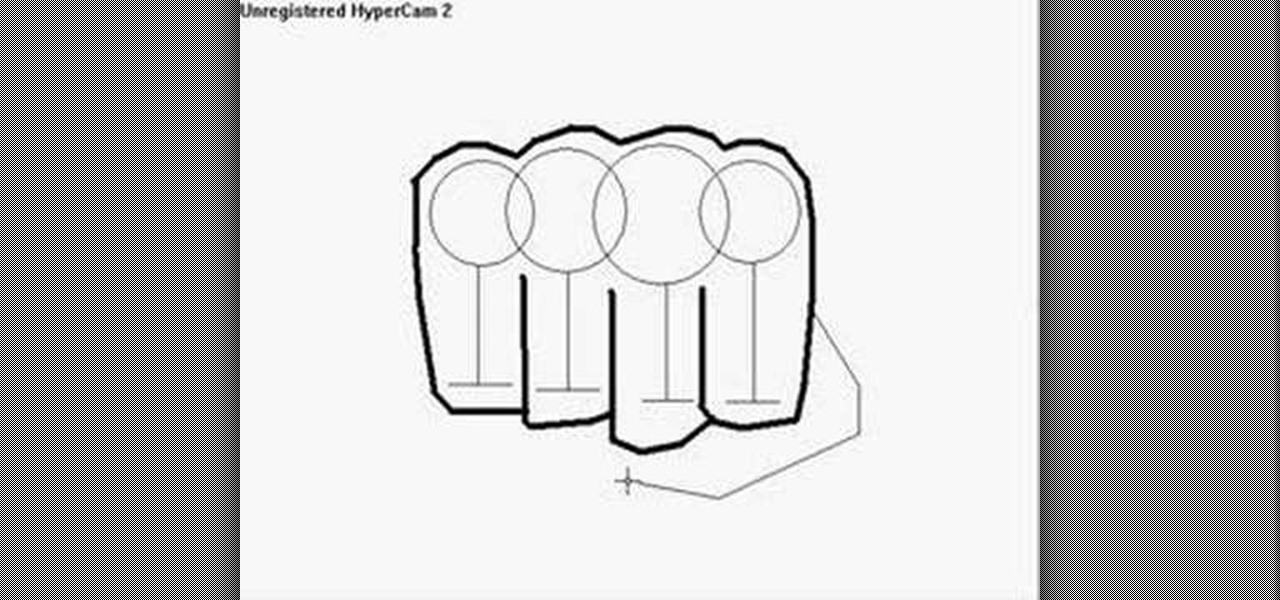
How To: Draw a fist
In this tutorial, we learn how to draw a fist. Start off by drawing for circles linked to each other, then draw lines coming down from the middle of each circle. Then, draw a line across the bottom of each vertical line, going horizontally. After this, use a dark line to outline around the circles and the bottom of the lines. Make sure to draw a line in between each of the individual lines. Next, add a couple of curved lines to make a thumb appear on the side. To finish, erase the original ci...
How To: Draw an urban garden using complex levels
Too often in the hustle and bustle of life we forget to take a deep breath, calm down, and embrace the quiet. Many of us are so wired to the point that the quiet scares us, leading to a state of constant overstimulation in which we develop stress, hypertension, and cardiovascular problems. Doesn't sound so fun, does it?
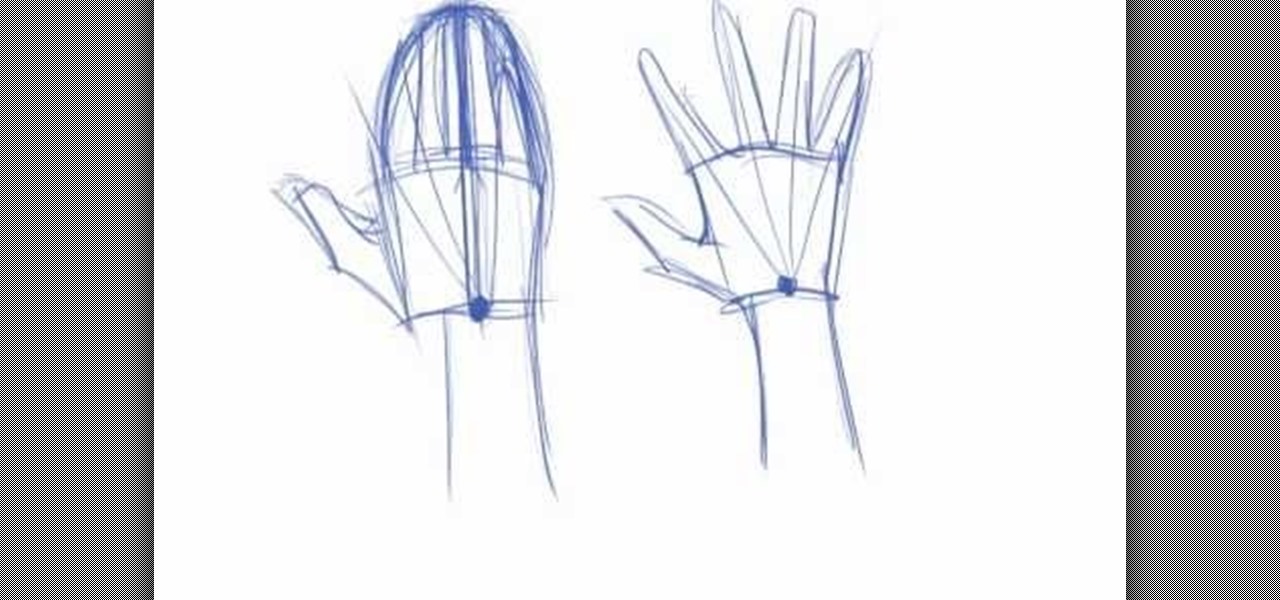
How To: Draw realistic hands in resting and action poses
We know of several artist friends who are practically reborn Monets with their pencils and brushes and can sketch out anything they imagine, except for hands. Not that they can't draw hands, but it seems that hands are the Achille's heel for many art students.
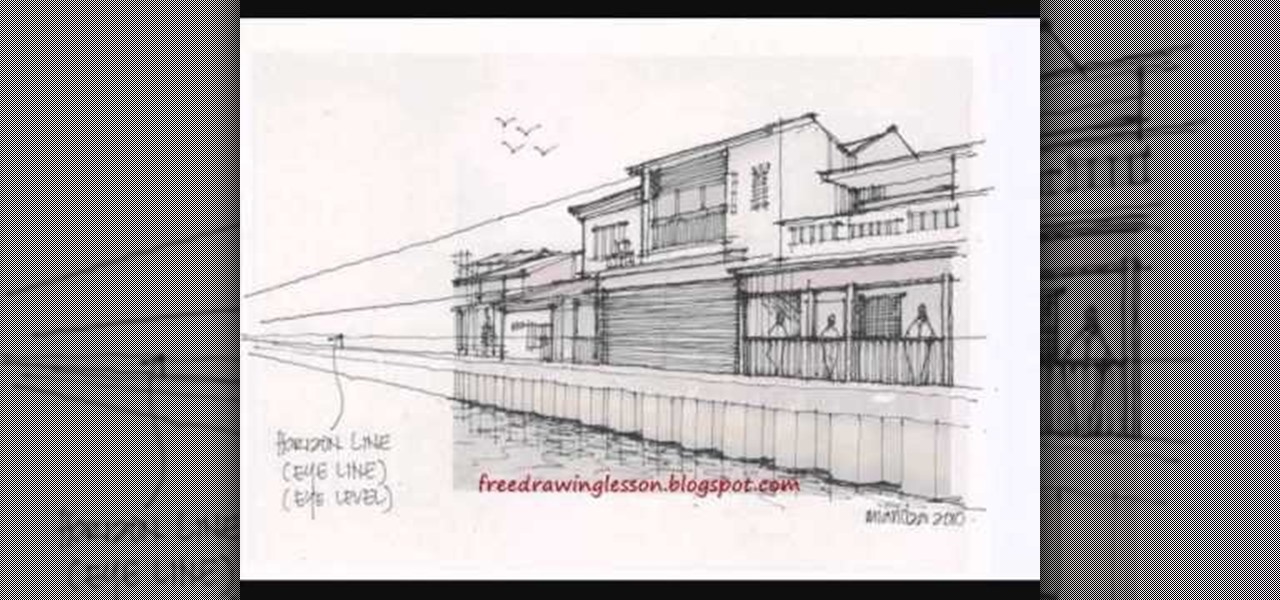
How To: Draw an elevated urban street with complex levels
Have you always secretly harbored a love for urban design or architecture but your parents made it clear to you that they would only financially support you through school if you studied pharmacy? We know your situation sucks, but just because you can't get a degree in urban planning doesn't mean you can't sketch out designs of beautiful cities.
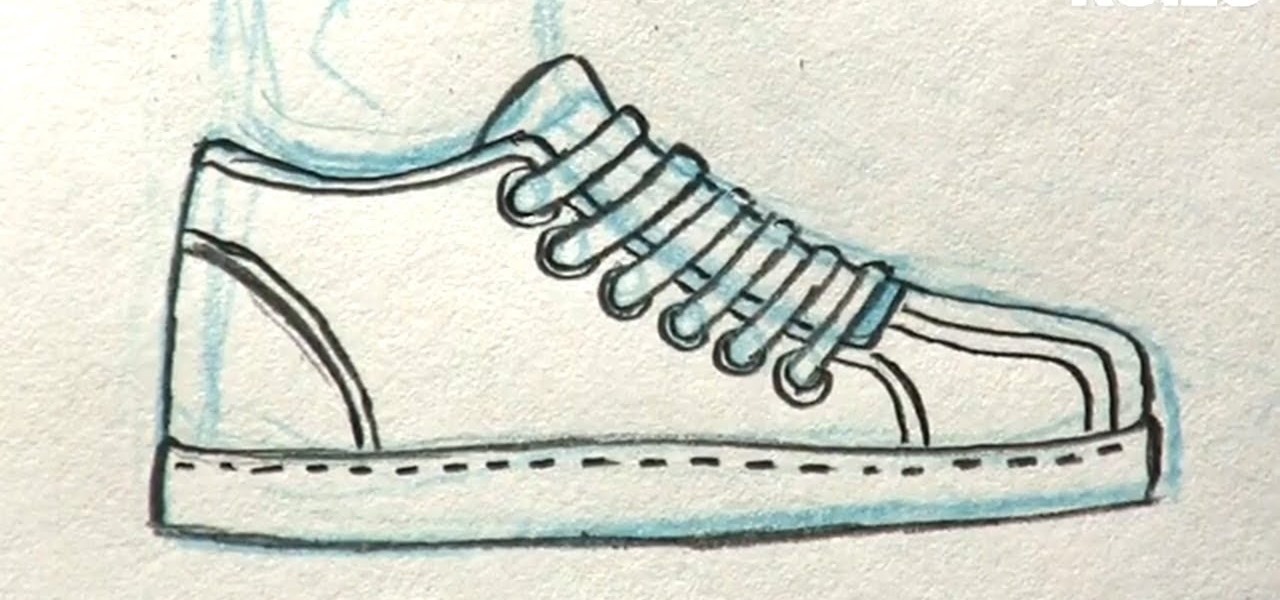
How To: Draw manga shoes
In this tutorial, we learn how to draw manga shoes. First, you want to sketch the basic shape of the foot. On top of this, you will draw a rough shoe shape with a different colored pencil. Next, draw in the details of where the laces are going to go, and where the lip of the shoe will be. Also draw in the soles and any other details you feel you need. Switch over to a black pencil to draw in darker details and add in shading throughout the drawing. When you are done, sign your name by your dr...

How To: Draw a daffodil for St David's Day
In this tutorial, we learn how to draw a daffodil for St. David's Day. Start off by drawing a circle to measure out where all of the different petals are going to go, then draw a circle in the middle you know where the middle will go. Next, start to draw out the petals onto the circle. After this, draw the middle of the daffodil with the seeds that are in the middle. After this, draw the lines that are in the middle of the leaves. You might want to use a real flower for a reference picture on...

How To: Write the letter S in calligraphy copperplate
In this video, we learn how to write the letter "S" in calligraphy copperplate. First, dab your calligraphy into ink, then start to writ on a your paper. Make a large half bowl shaped curved line, then make a loop and go down, creating a curved line with a dot at the end. To make the lowercase letter, make a thin line, followed by a thick outer line that curves into the large line making a lower case s. When you are finished with both of these, you will have beautiful letters that look great ...
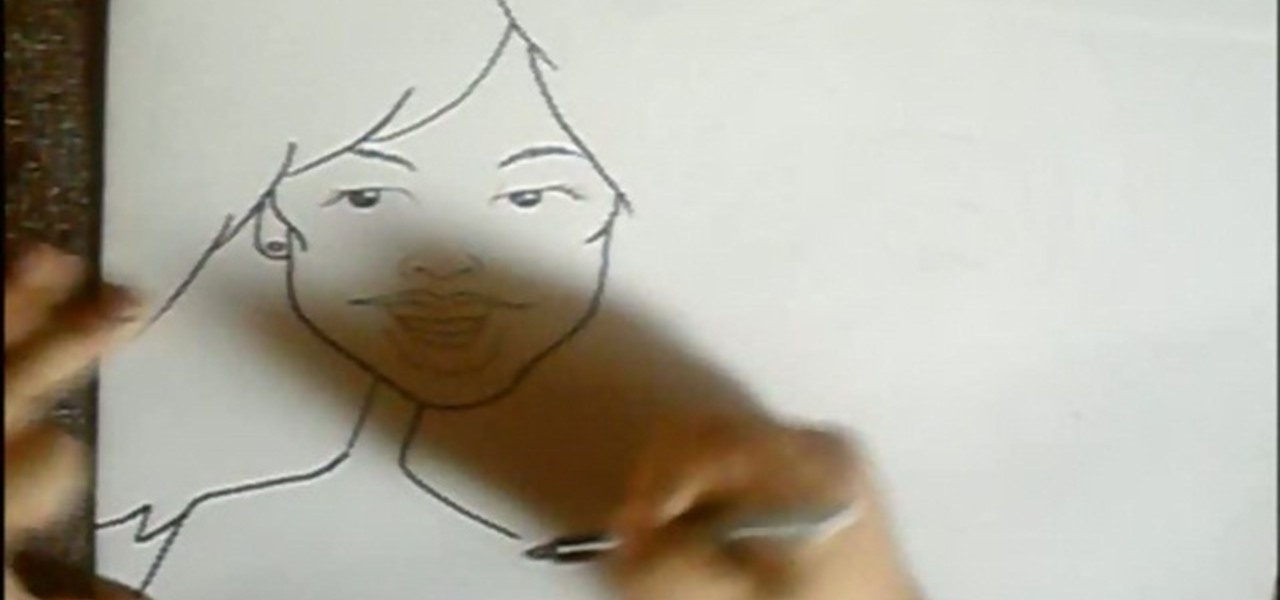
How To: Draw cartoon caricatures
In this tutorial, we learn how to draw cartoon caricatures. Start off by drawing the eyes and the eyebrows. Next, draw in the hair on the forehead and then start to make the face surrounding the hair. After this, you will need to draw in the ears and make a note to draw in any prominent features that the person you are drawing has. Make sure to draw larger lips and a small neck, making the head look larger. For men, do the same thing and give each of the pictures a bit of personality! Don't b...

How To: Draw wings
In this tutorial, we learn how to draw wings. To start, use line options to make curves that bend out and turn into a long and thin wing. You can copy and paste this wing so that all the different parts of the wing are the exact same. After this, use a free hand brush to draw curved lines onto the top of the wing outline. After this, start to add circles and other details to the wing. You can fill it in with color or add in more feathers where they would be on top of the wing. To finish, save...
How To: Draw Neopet cartoon cats
In this tutorial, we learn how to draw Neopet cartoon cats. First, use a small brush to create the outline of each of the cats. Use light strokes to make the outline, then start to add in the details onto the cat with a darker colored brush. Add in the details of the face, including the whiskers, mouth, and eyes. Don't forget to add on the ears as well. Erase and lines that are on the back of the drawing, so all you see is the darker and more exact lines. Continue on drawing the body, making ...
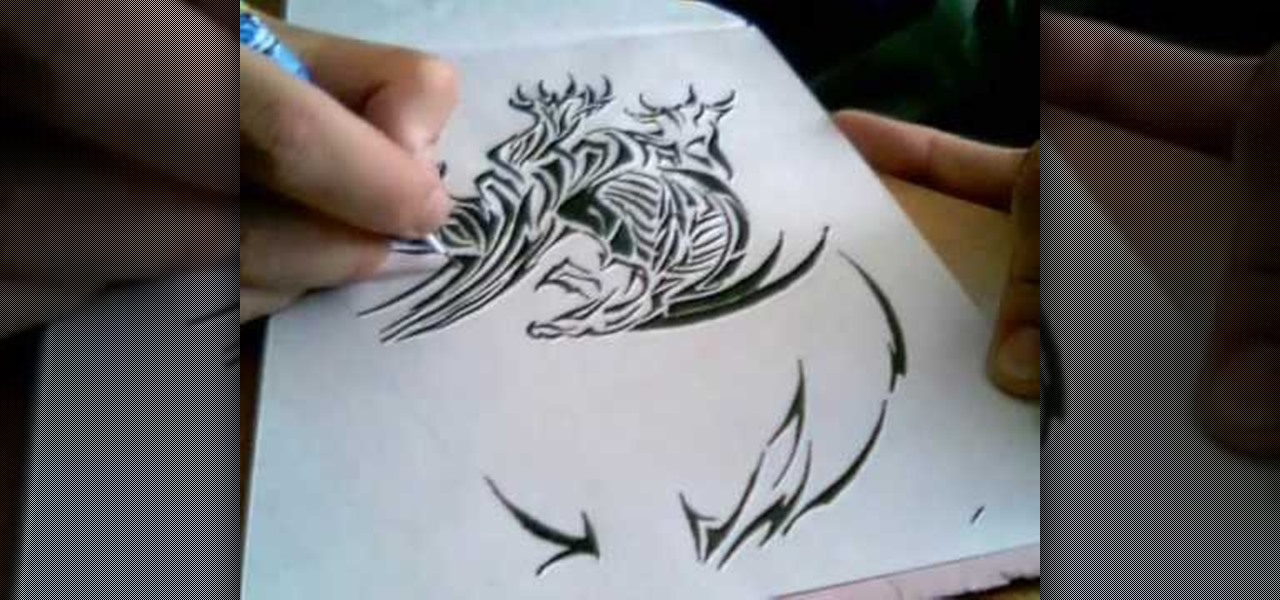
How To: Draw a tribal style dragon
In this tutorial, we learn how to draw a tribal style dragon. Start off by drawing the wings of the dragon, adding in tribal designs on the inside of it. After this, start to draw the head of the dragon, as well the inside of the face. Also, draw the legs and the claws of the dragon. Add in more details until you have a full dragon design. Use a pen to fill in the lines on the tribal design. It will sort of look like a zebra pattern with the black and white colors rotating. When finished, sig...

How To: Draw a cartoon brontosaurus
In this video, we learn how to draw a cartoon brontosaurus. First, draw a large hump that is a half circle, then draw a line on the other end of this. After this, draw a tail on the other end of the hump and then go down and draw the feet on the bottom. Continue going and draw up the neck and make a circle for the head. Draw in a large eye on the head and make a smile on it. Next, draw soft spikes on the back of the dinosaur and color it in if you prefer, then enjoy your cute drawing!

How To: Draw a rose, step by step
In this tutorial, we learn how to draw a rose, step by step. start off drawing the petals of the rose, making the inside of the flower first. After this, start to draw in more details and draw around the inside of the flower, making the rose larger and larger. After you have done this, draw on the stem underneath where the petals are, and add leaves onto the stem. Continue to add in any details that you see fit throughout the picture. When you are done drawing, color it if you prefer, then si...
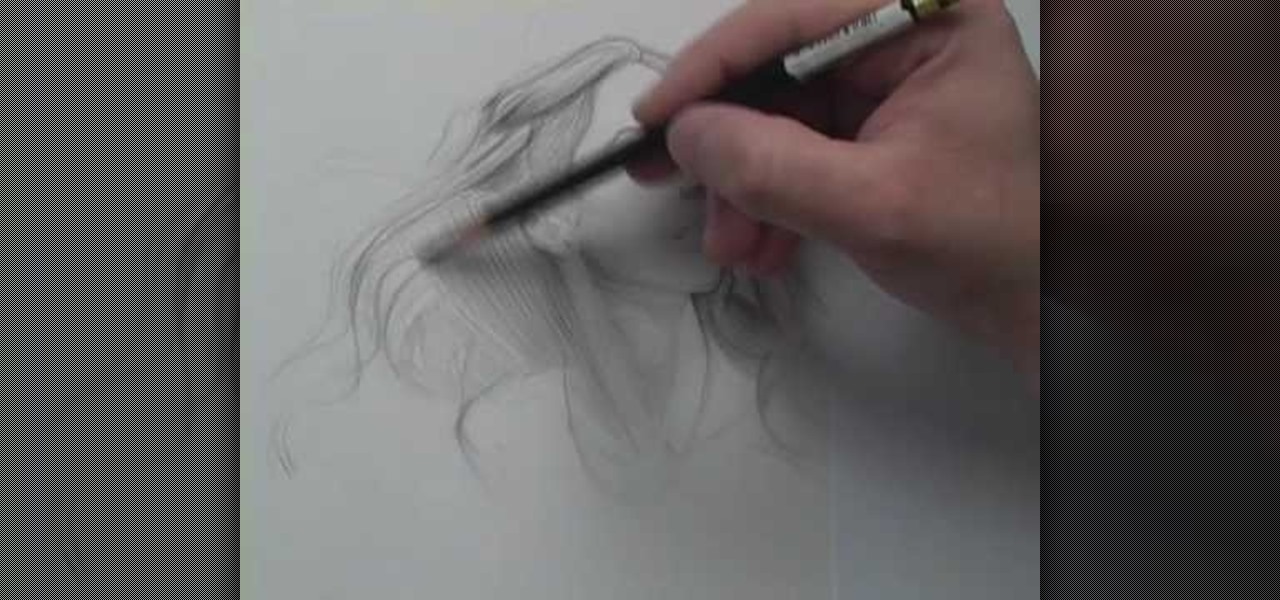
How To: Draw wispy hair
In this tutorial, we learn how to draw wispy hair with Matthew Archambault. When drawing these, you will first start off with a light pencil to make the hair look soft. After this, you will want to make the shapes of the strands look unique, then work from light to dark with the different strands. Use a harder pencil mark when you draw the outline of the hair. Make sure you don't do hard edges at all, everything needs to be soft. make sure you are drawing the hair outwards to make it look lik...

How To: Draw cartoon style mouths
In this video, we learn how to draw cartoon style mouths. Start out by grabbing a marker and drawing a round circle, then draw a shape on the inside and draw teeth on the top and bottom of it. After this, draw a tongue inside of it. For the next mouth, draw a curved line with teeth on the top, then a tongue in the middle. For the next mouth, you will draw a long tongue sticking out of a mouth. These mouths can be used in a number of different pictures, depending on what kind of face you are g...
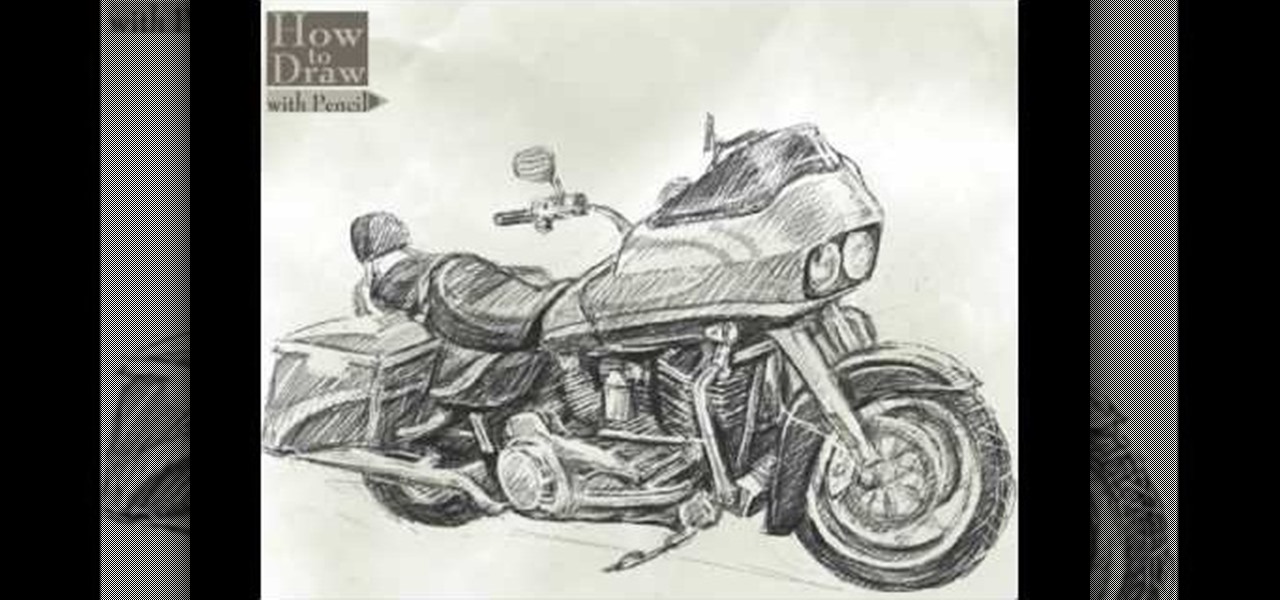
How To: Draw a Harley-Davidson Road Glide
In this video, we learn how to draw a Harley Davidson Road Glide. Start off by drawing the body of the motorcycle as a rough outline. After this, start to fill in the different areas by making large sections of the bike 3-D. Draw in the wheels and the back of the bike, as well as the handle bars, mirrors, and lights. Draw the seat and back seat in, then start to add in further details. Apply shadowing to the car, making some parts darker than others. When you are finished with the drawing, co...

How To: Draw Naruto (face and head)
In this video, we learn how to draw Naruto. Start out by drawing a circle as the outline. After this, draw the jawline. Next, draw lines in the middle so you know where you are going to draw the eyes and the rest of the facial features. Next, define the features on all the different parts of the face. Start to add in shading to the face, then draw in the hair. Next draw in a hair band at the top of the head, followed by spiked hair coming out of the top and ears on the side of the face. When ...
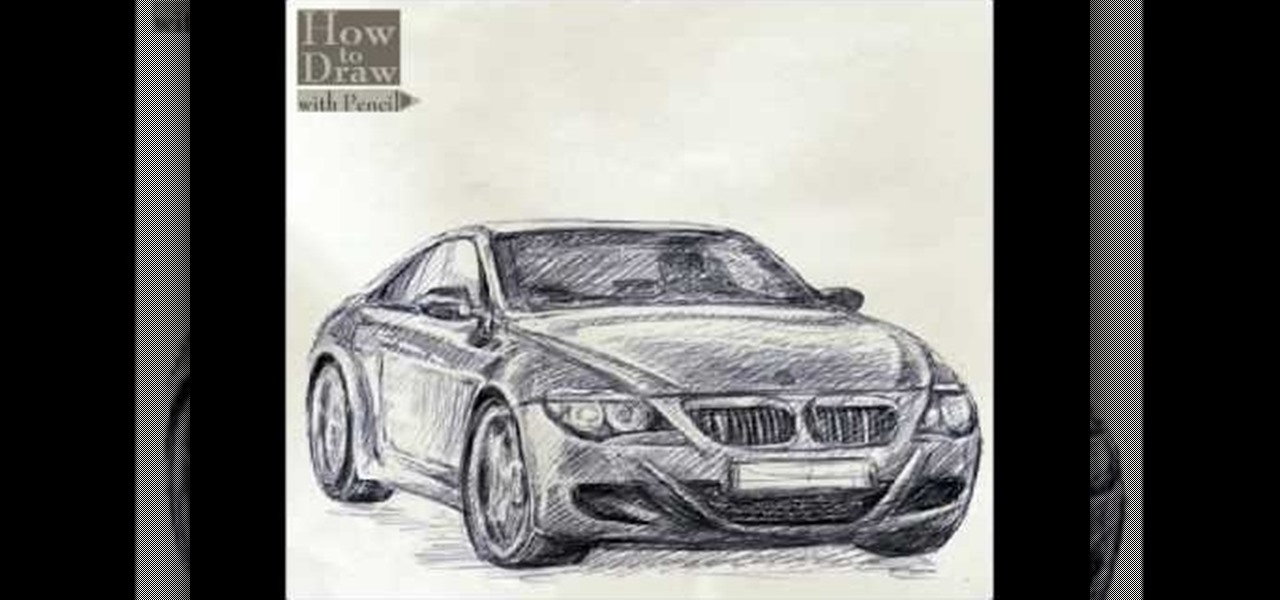
How To: Draw a BMW car
In this video, we learn how to draw a BMW car. Start off by drawing the outline of the car. After this, start to shade the drawing and add in the details of the car. Draw in the windshield, headlights, grill, license plate, and all the other small details. Make sure to use shading underneath the car to make it look more realistic. Also do shading inside the driver's seat to make it look like someone is inside of the car driving. Erase lines where you don't need them to make the car look more ...